Scan Work Order Invoices from Photos and Documents
What is this?
AI Invoice reads a vendor invoice and fills in the work order for you. It pulls out the vendor, invoice number, date, labor, parts and extra costs. You can upload a PDF, a photo of a paper invoice, a screenshot, or a Word or text file. Snap a picture of the invoice in the shop and upload it as is.
Who's this for?
- Shop foremen and mechanics, add an outside repair invoice from a phone photo in under a minute.
- Equipment managers, get vendor costs onto the right work order without typing them in.
- Office and accounting staff, use the scanned copy or emailed screenshot you already have. No converting to PDF first.
How to use it
Step 1: Open the work order
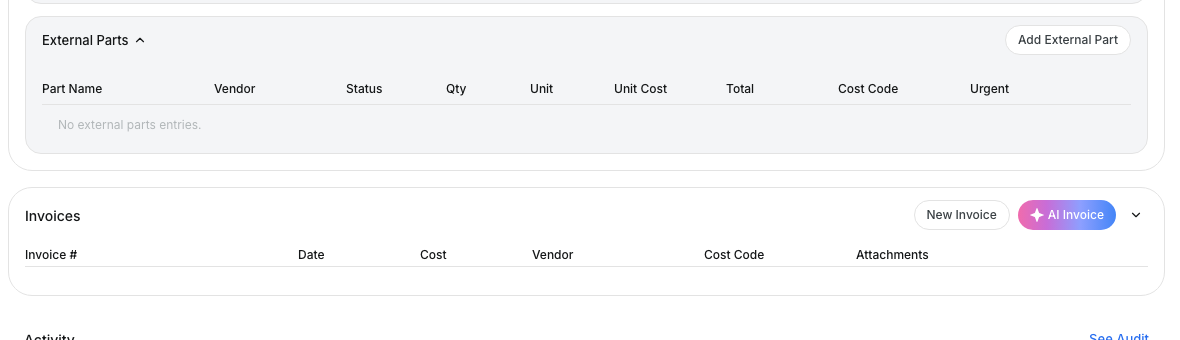
Go to Work Orders and open the work order. Scroll down to Invoices and click AI Invoice.
Step 2: Choose your file
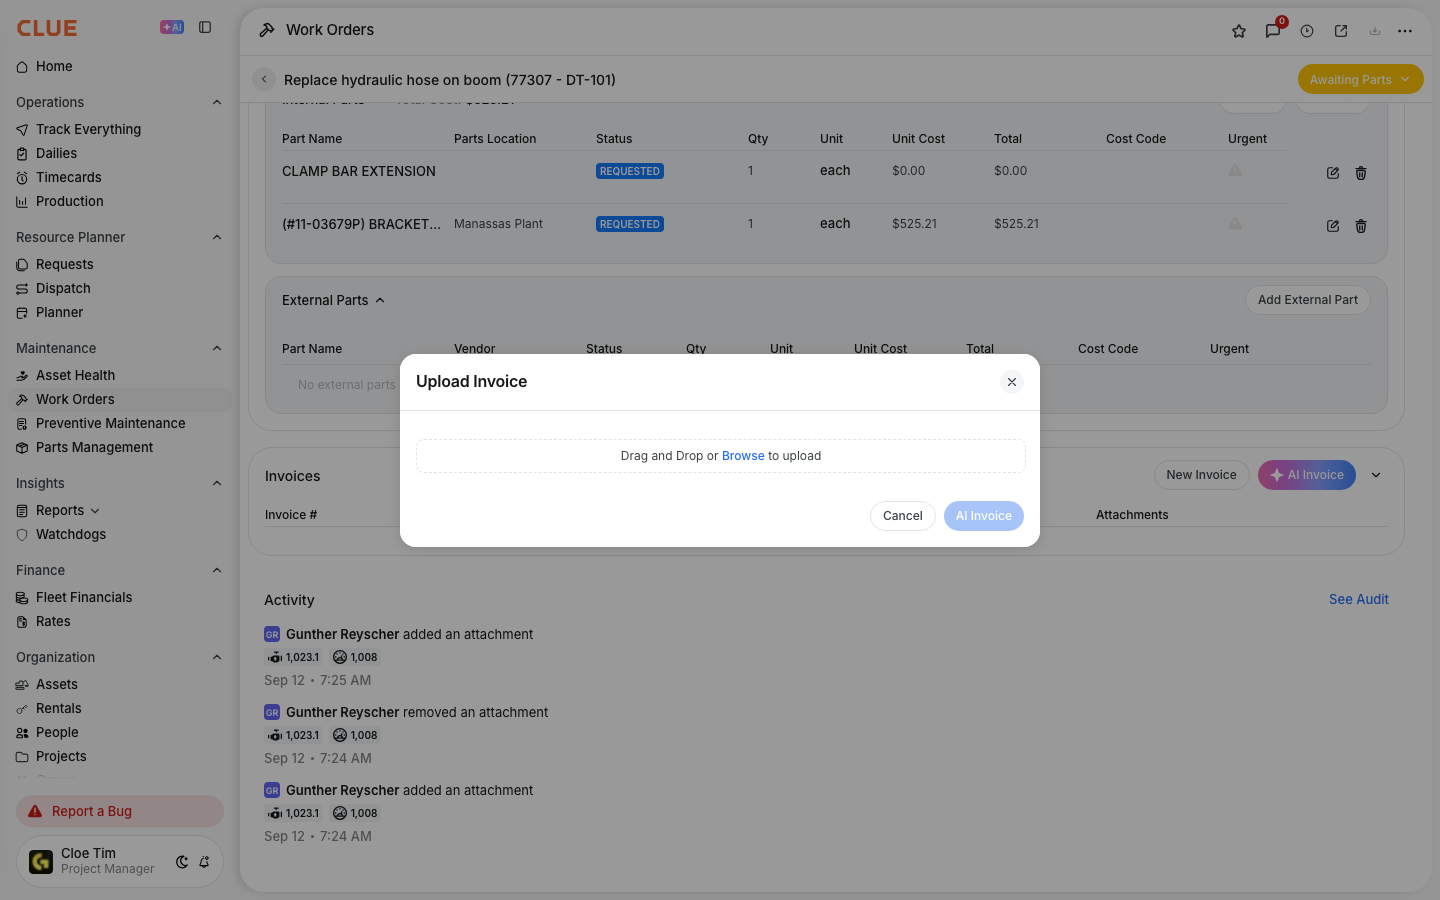
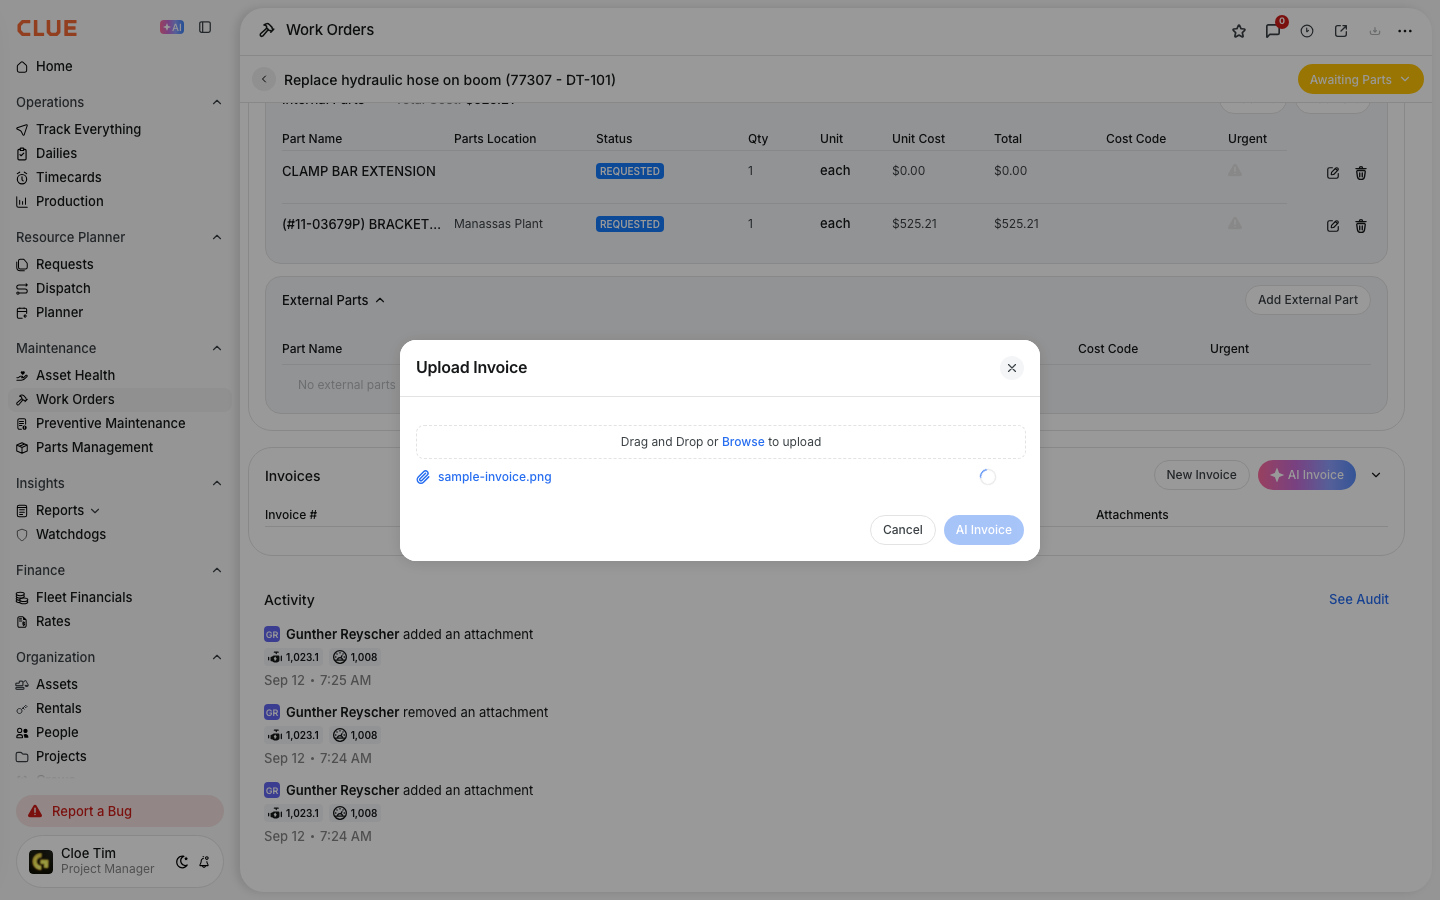
The Upload Invoice window opens. Drag your file into it, or click Browse.
Step 3: Start the scan
Your file appears under the upload area. A photo works just like a PDF. Click AI Invoice to start the scan.
Step 4: Review and import
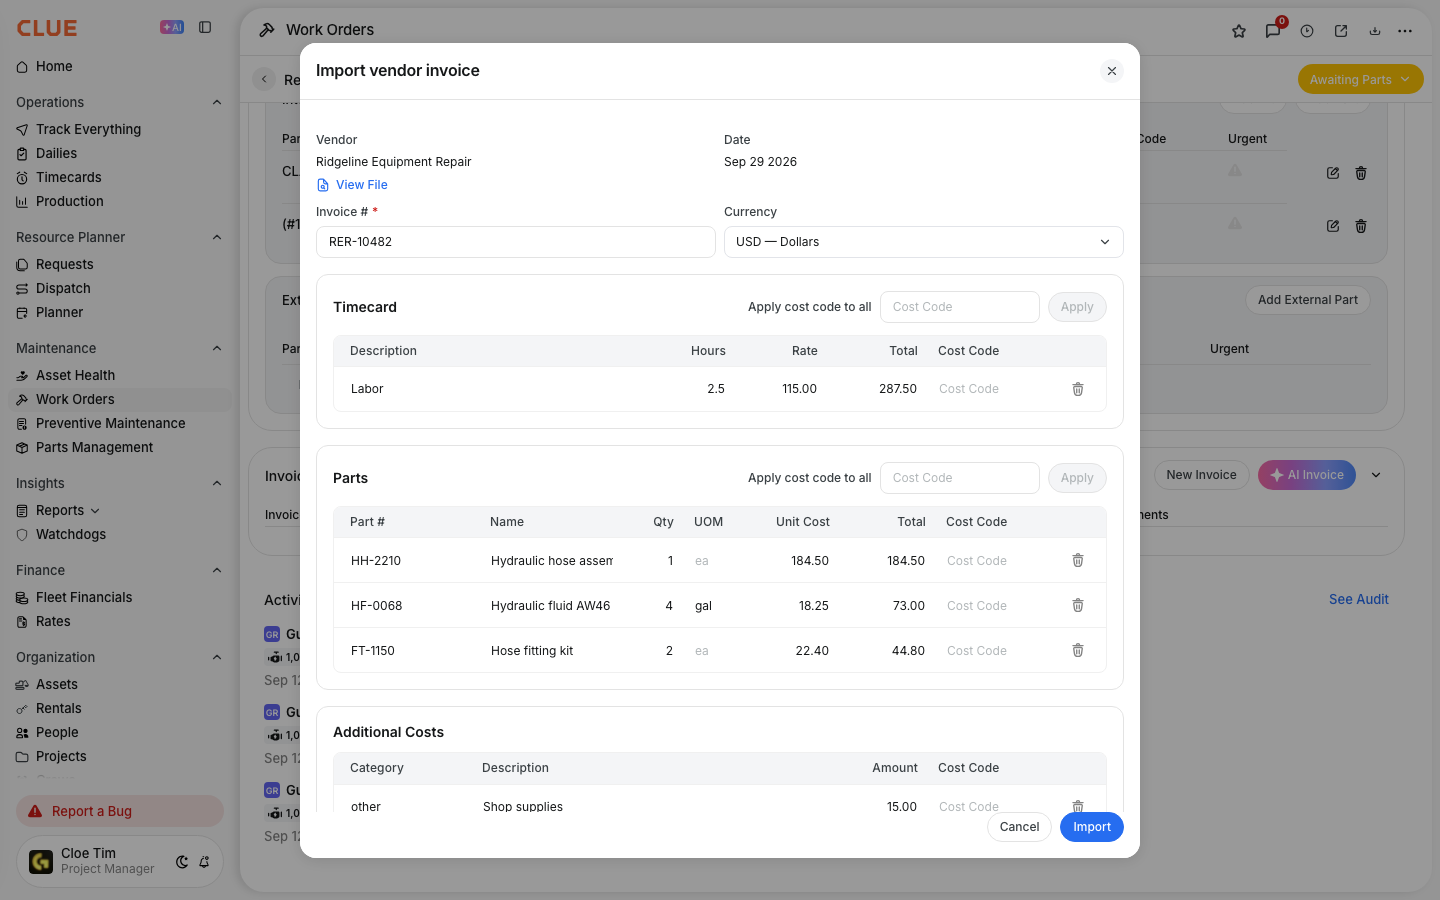
Clue shows what it found: vendor, invoice number, date, labor, parts and additional costs. Fix anything that looks off, add cost codes if you use them, then click Import. Click View File to compare against the original.
The full details
- Works on: Web app, on the work order details page.
- File types: PDF, JPG, PNG, HEIC (iPhone photos), WEBP, Word (DOCX) and plain text (TXT).
- File size: Up to 20 MB per file.
- Nothing is saved until you click Import. Click Cancel on the review screen to leave the work order unchanged.
- Can't find the Invoices section? It is turned on per company. Ask your Clue administrator.
- If Clue can't read the file, you'll see a message saying it couldn't extract the invoice data. Try a clearer photo or the PDF.
Tips
- Lay the invoice flat in good light and fill the frame. A sharp photo scans as well as a PDF.
- Get the whole page in one shot, including the totals at the bottom.
- Always check part numbers and quantities on the review screen before you import.
- Use View File on the review screen to check a number against the original without leaving the page.