Track warranties and certificates on each of your assets so your team can check coverage before approving repairs, ordering parts, or reviewing service records. This fits in with the Asset Directory, work orders, and the CLUE mobile app when your team needs quick answers before work begins.
This feature lets you store warranty and certificate records on each asset and makes them easy to find and review. It helps your team see what is active, what is close to expiring, and what has already expired before repair decisions are made.
Every asset can carry warranty and certificate records. CLUE helps you by tracking expiry dates, engine hours, or odometer readings, so that coverage can be reviewed using the limit that matters the most for the asset.
This feature is useful for the people who need to check coverage before costs for repairs are approved or work on the asset even starts. It is most helpful for maintenance teams, equipment managers, and anyone responsible for keeping asset records complete.
- Equipment Managers can track warranty coverage across the fleet and stay ahead of expiry dates
- Shop Foremen can check warranty status before approving repair costs on work orders
- Mechanics are able to review coverage using the mobile app before adding parts or labor
- Compliance Teams can use certificates to keep inspection and supporting records tied to the asset
How to Use It?
Use the asset record to check warranty status, open warranty cards, and add or update records when needed. A single asset can hold more than one warranty or certificate record, which makes it easier to track OEM, aftermarket, and extended coverage in a single place.
1. Check Warranty Status in the Asset List
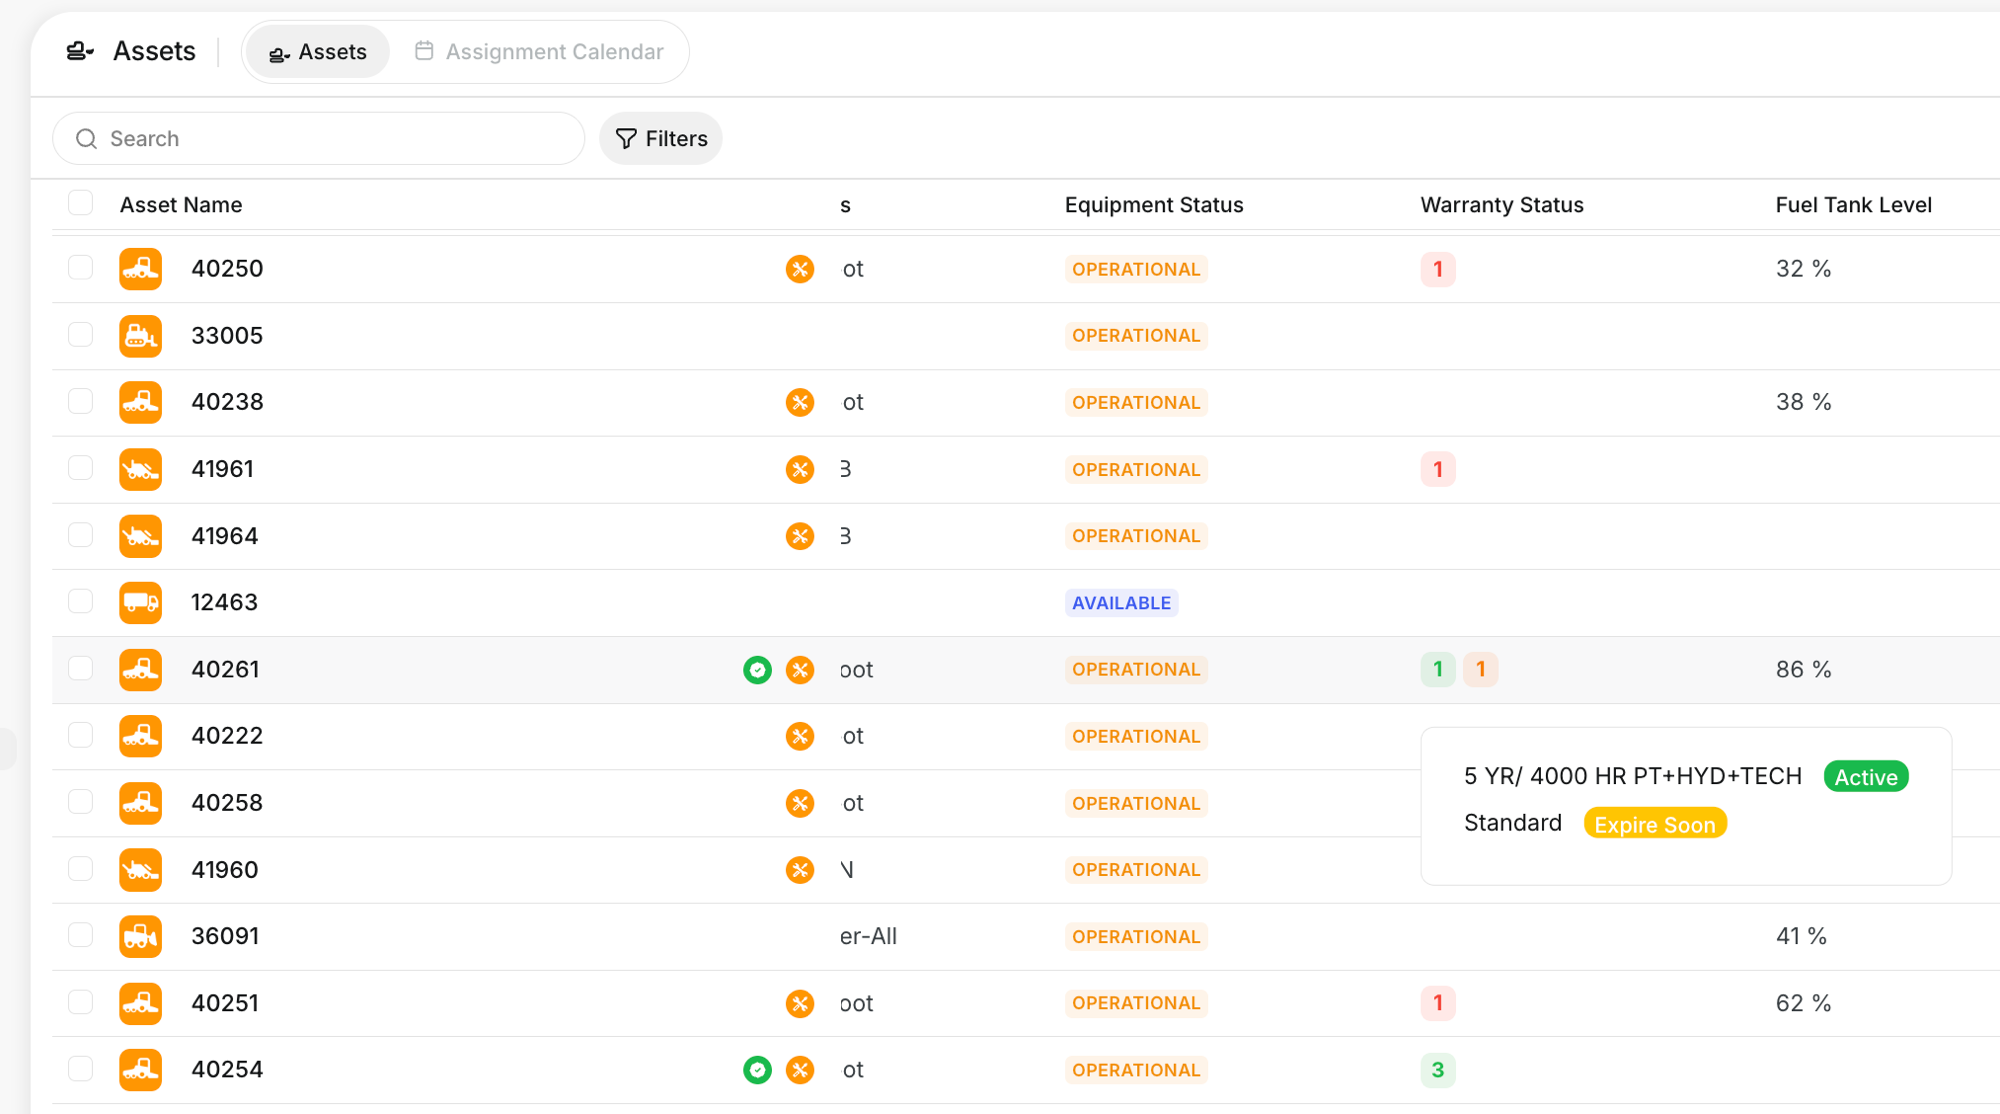
Go to Assets. The Warranty Status column shows a badge for each status an asset has records in, and the number on the badge is how many records are in that status. Green means active, amber means expiring soon, and red means expired. Hover over a badge to see each record by name with its status.
2. View Warranty Details
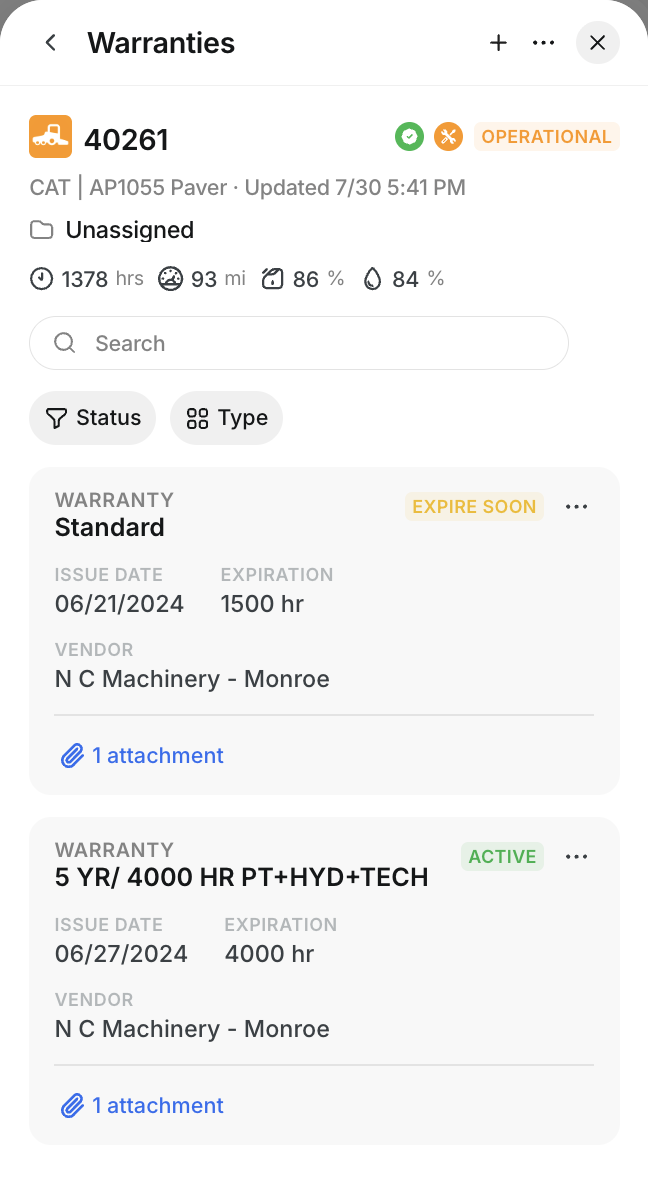
Click the asset name to open its panel, then choose Warranties from the ... menu. Each card shows the title, status, issue date, expiration, vendor, and any attached documents. Use Status and Type at the top to narrow a long list. This helps your team quickly access and review coverage without digging through emails, paper files, or vendor folders.
3. Add a Warranty or Certificate to an Asset
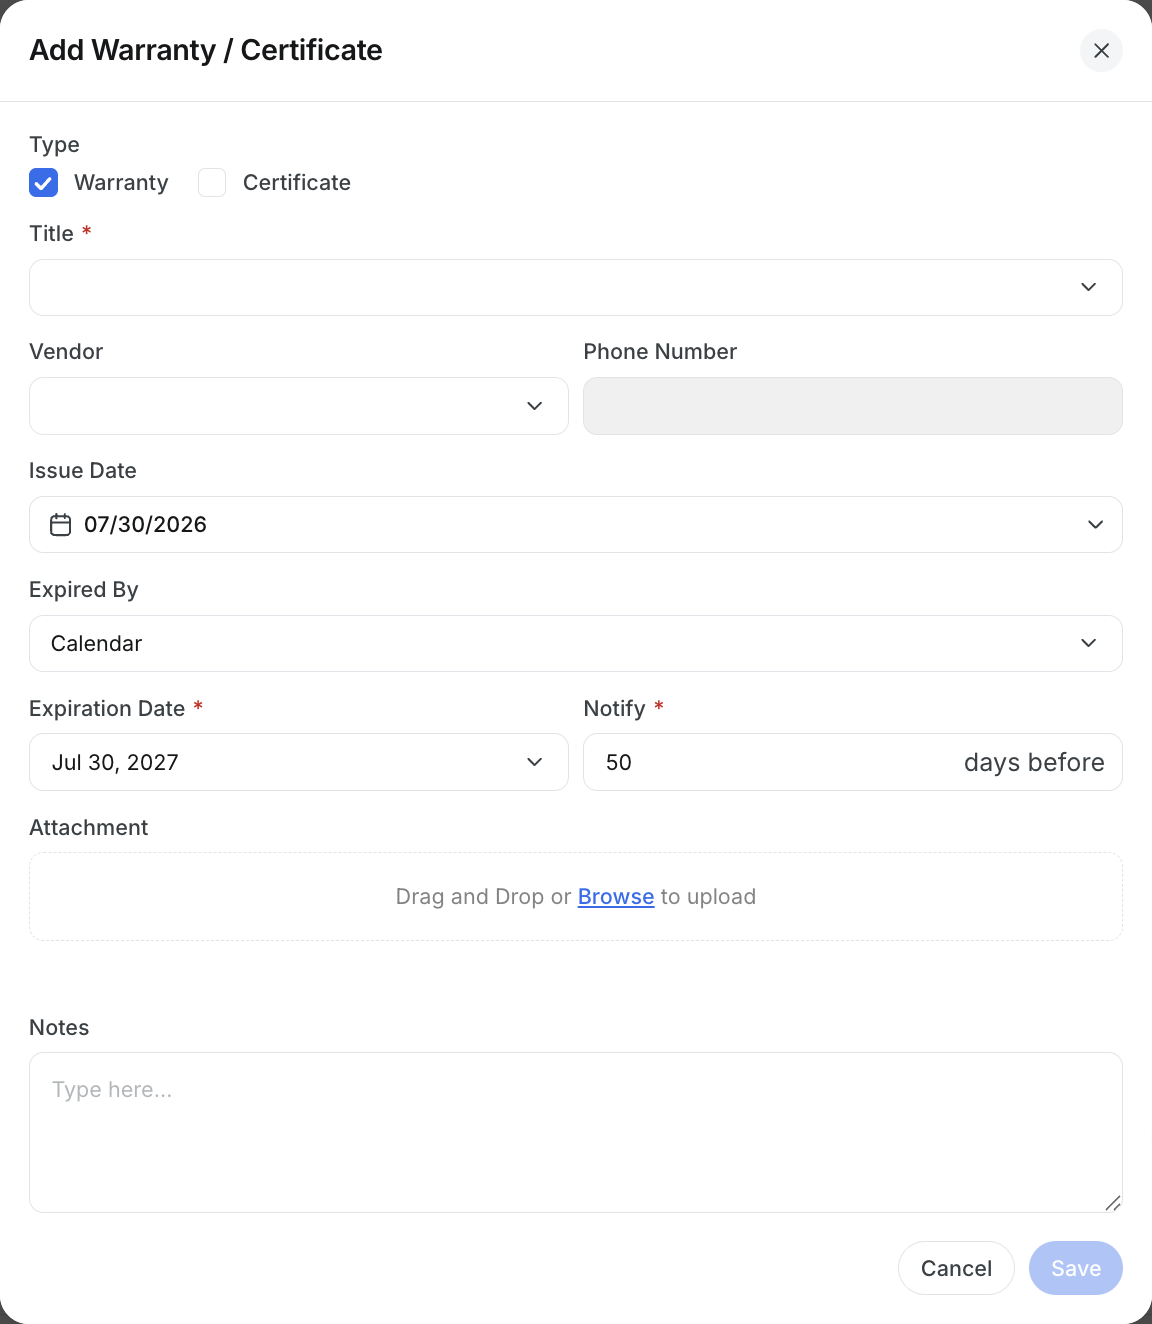
Click the + button, then pick Warranty or Certificate at the top of the window. Enter the basic details, such as the title, vendor, issue date, and expiration method. You can also attach documents such as warranty certificates, inspection records, or other supporting files. The Expired By field controls how CLUE tracks the record. It can track by calendar date, engine hours, odometer readings, or by whichever limit is reached first.
Set the Notify field if you want to receive an alert before the warranty or certificate expires. The unit follows your Expired By choice, so calendar coverage is counted in days and engine hours coverage is counted in hours.
4. Editing and Deleting Warranties
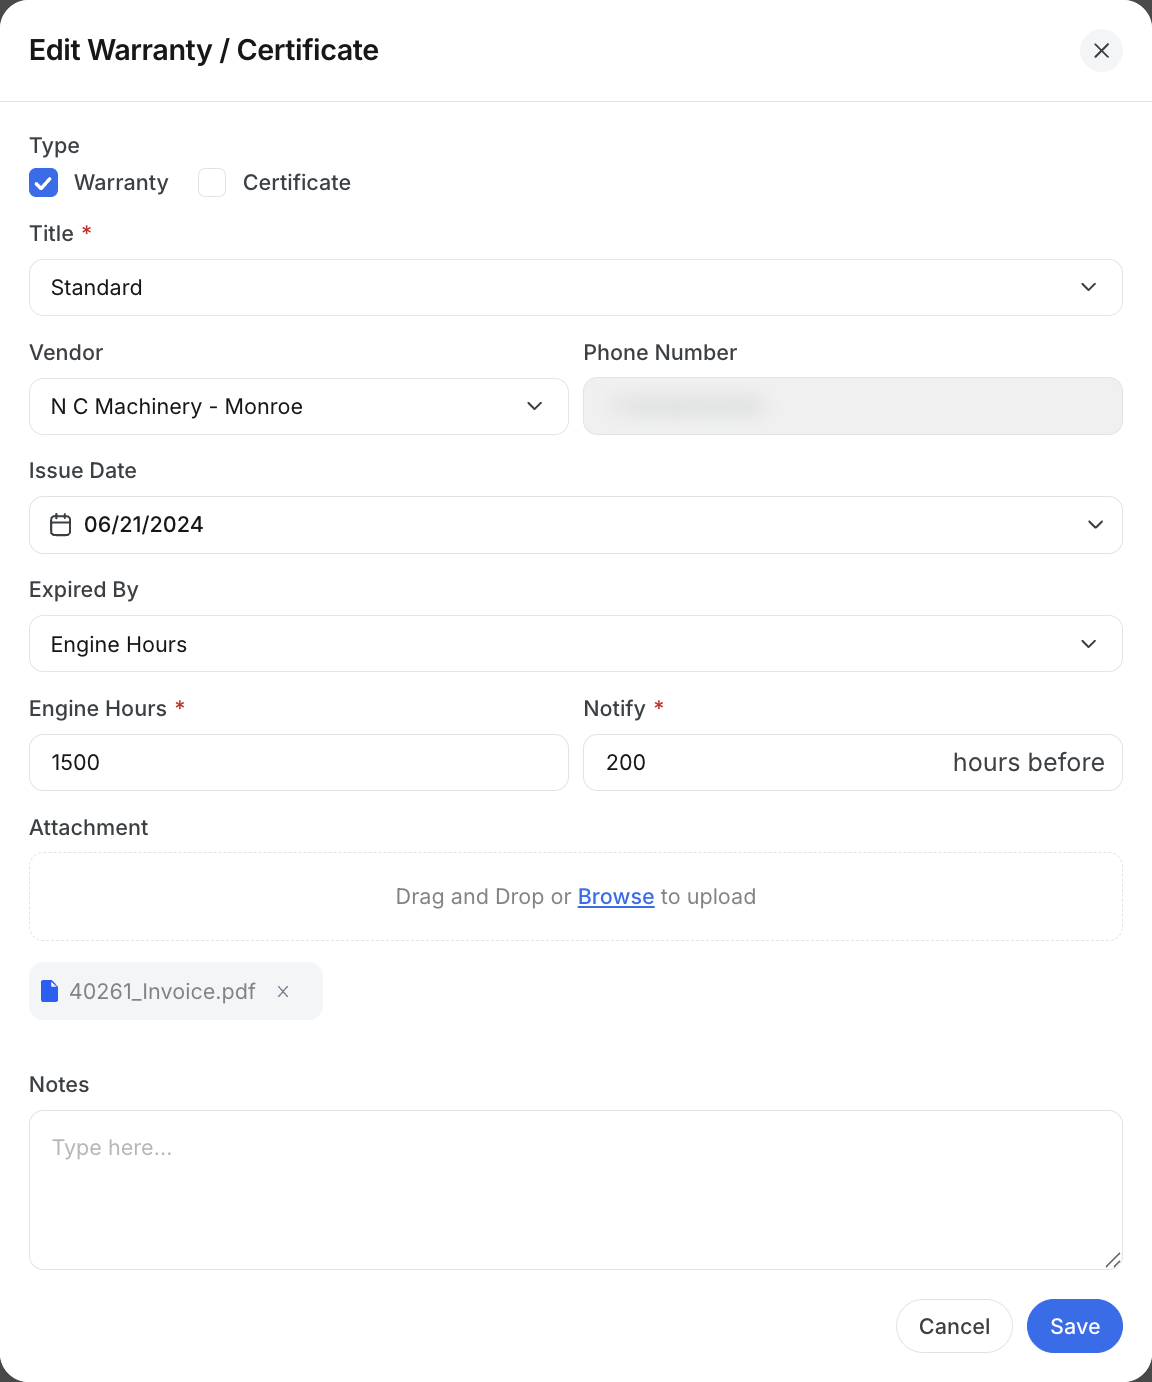
Click the three dot (...) menu on any warranty card to edit or delete it. Use this when terms change, when a certificate needs to be updated, or when old records need to be removed so the asset file stays accurate.
5. Warranty on Work Orders
When a work order is linked to an asset with active warranties, a blue Active Warranties badge appears in the asset details. This prompts the foreman to check coverage before approving the cost.
6. Warranty on Mobile
On the Android or iOS mobile apps, assets under warranty show an Under Warranty banner at the top of the detail screen. This provides mechanics with a quick reminder before they add parts or labor.
Summary
The Warranties and Certificate Tracking feature helps by keeping warranty records close to the asset and pulls them into the normal repair workflow. They help your team catch coverage early and avoid paying for work that may still be covered.
- Works on the web app and mobile app
- The feature is located within Assets > [asset] > ... menu > Warranties
- You can set Expired By to Calendar, Engine Hours, Odometer, Calendar or Engine Hours, Calendar or Odometer
- Status badges will show one of Active, Expire Soon, or Expired
- You can set up notifications to alert you before the expiry date
- If your company uses the Vista integration, Clue imports warranty records from Vista every day at midnight. You do not have to type them in.
- The warranty badge is a reminder only. It does not stop anyone from adding a cost to the work order. The foreman makes the decision.
- Certificates use the same form to track inspections, compliance records, and similar documents
- Work Orders are integrated with warranties and certificates. You will see a warranty count badge on work orders where assets have active warranties.
Tips
A few simple habits can make this feature even more useful for you and your team. CLUE's goal is to help your team stay ahead of expiry dates and check coverage before repair costs are approved.
- Set notifications early so there is time to renew or plan around coverage gaps
- Attach the invoice or certificate to the record so the proof travels with the asset
- Use certificates for annual inspections and other compliance records that should stay with the asset
- Check warranty status before approving repairs on Work Orders
- Keep records complete and together so the Asset Directory stays useful for the whole team