Understanding Inspection Templates
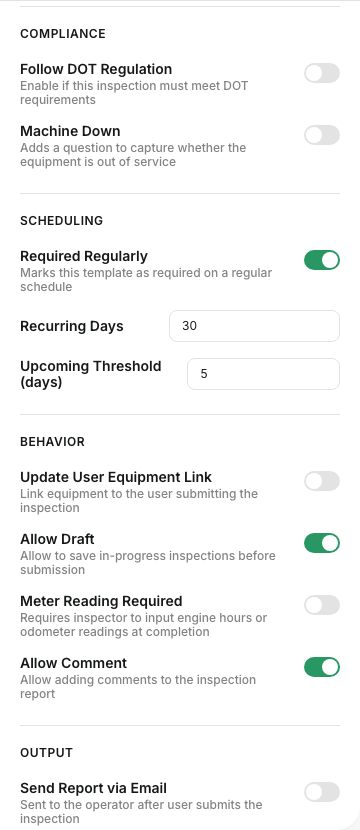
Inspection templates define what operators check during inspections. They help your team use the right checklist for each type of equipment and keep inspection records more consistent across the fleet.
Overview
Templates are used to set the structure of an inspection before anyone fills it out in the field. In CLUE, they can be customized to match different equipment types, operating needs, and compliance requirements.
What Are Inspection Templates?
An inspection template is the checklist your operator or inspector completes during a pre-trip, post-trip, or equipment inspection. It tells CLUE what needs to be checked, how each item should be answered, and when extra proof like a photo is required.
Templates can include:
- Inspection items - the specific things people need to check, such as tires, lights, or brakes
- Item categories - groups like Exterior, Interior, Engine, or Safety
- Response types - answer options such as Pass / Fail or Good / Needs Attention / Critical
- Required photos - photo proof for items that need extra documentation
Default Templates
CLUE includes standard templates for common equipment so teams do not always have to start from scratch. These can be used as they are or adjusted to better match your operation.
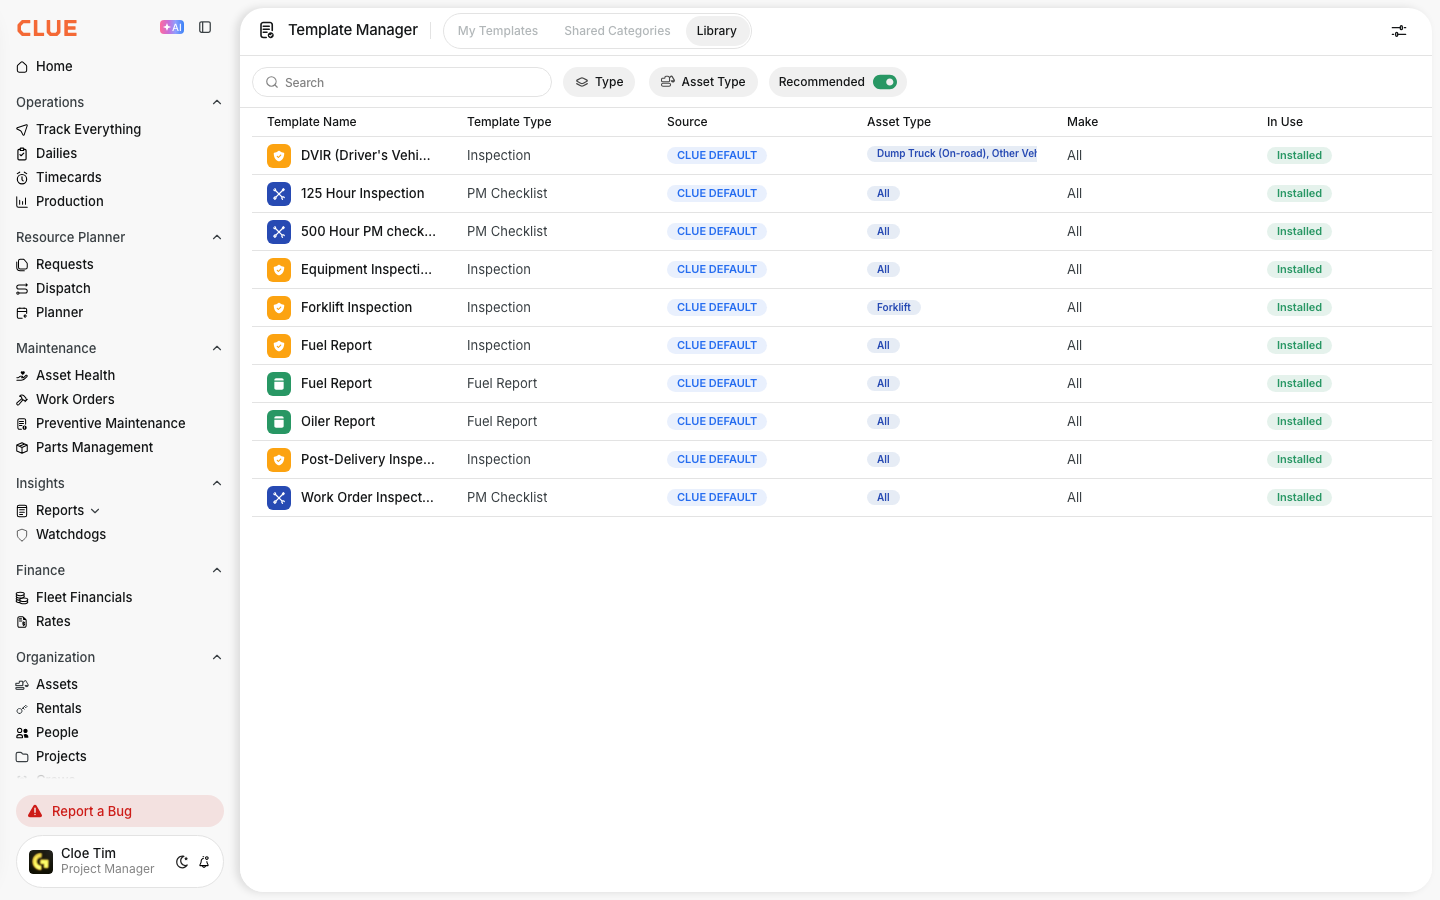
Common default templates include:
- Vehicle DVIR - standard DOT-style pre-trip inspection
- Heavy Equipment - checklist for construction equipment
- Trailer - inspection items specific to trailers
If your team needs to build or change templates in more detail, Template Manager: Creating Templates is the next place to go.
Template Components
Each template is made up of a few core parts. These parts control what the inspector sees and how the checklist works in the field.
Inspection Items
Inspection items are the individual checks inside the template. Each item tells the operator what to review and how to respond if there is a problem.
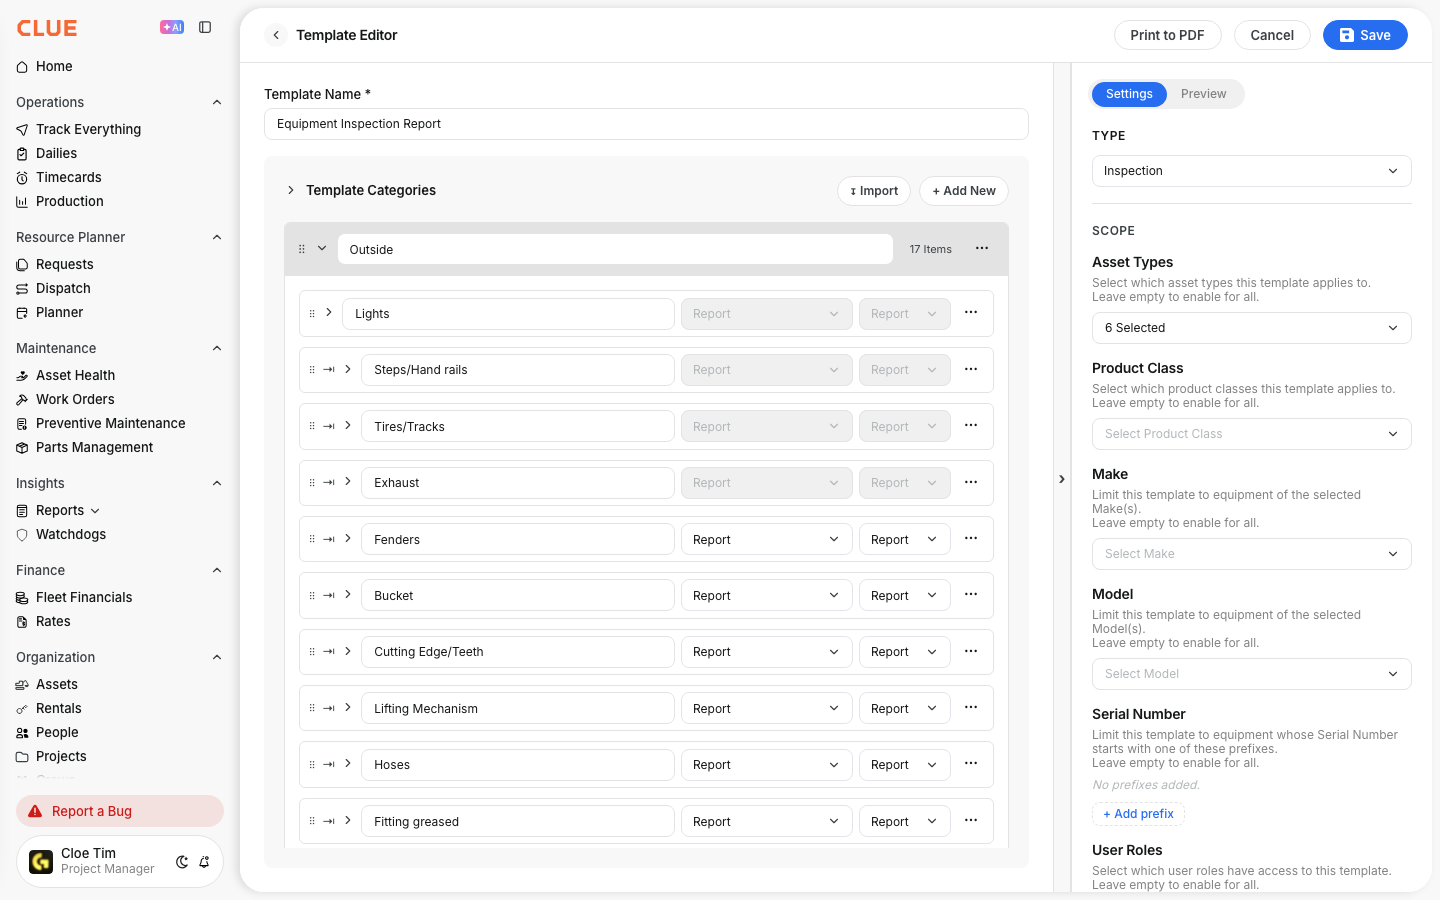
Each item can include:
- item name and description
- response options
- whether a photo is required
- severity when an issue is reported
Categories
Categories group similar inspection items together. This makes the checklist easier to follow and helps the inspector move through the equipment in a more organized way.
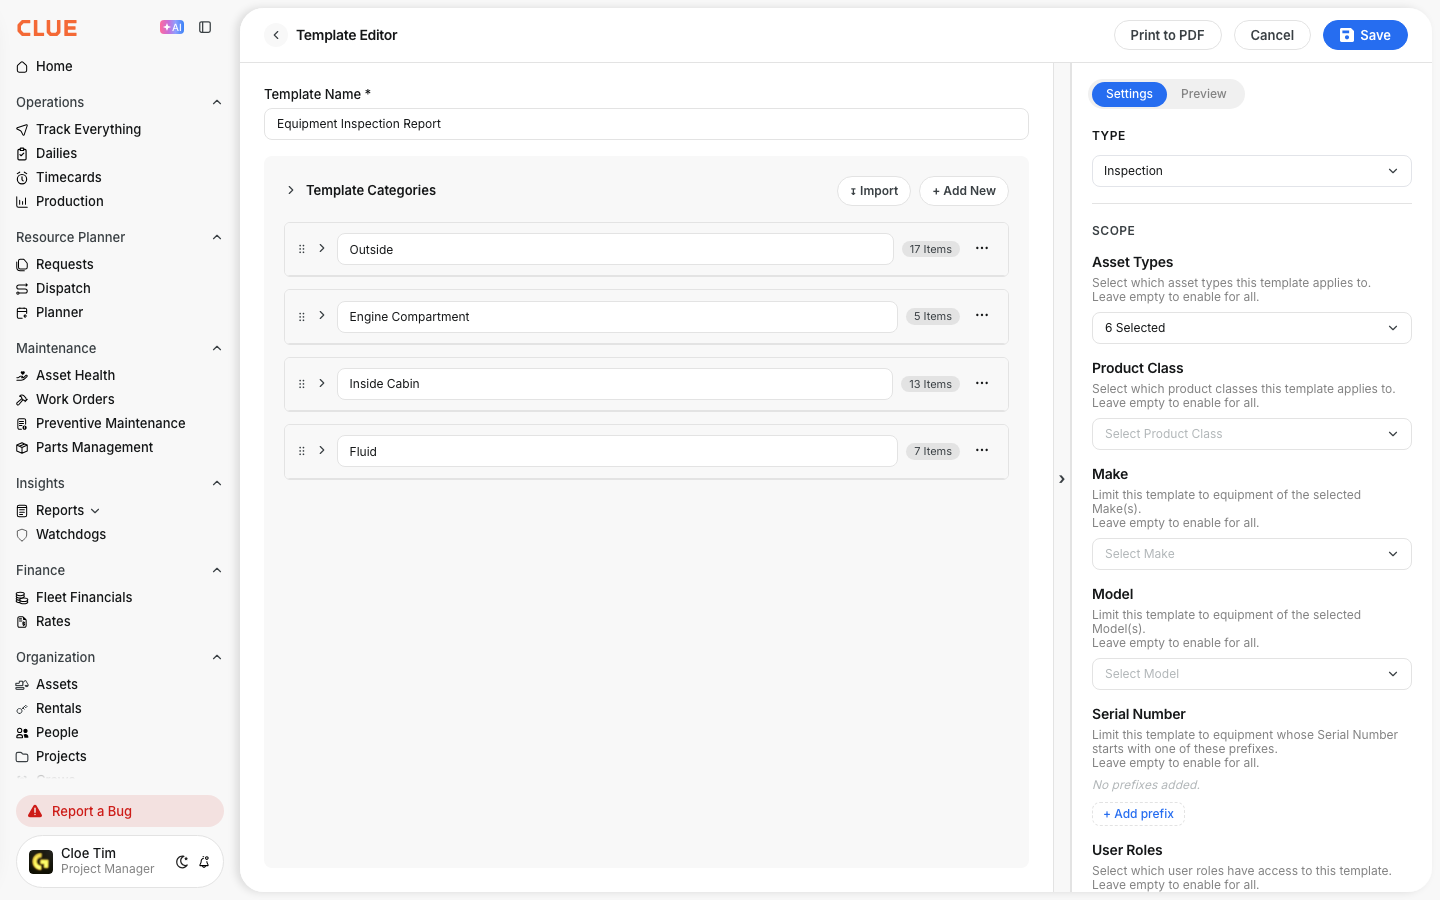
Common categories include:
- Exterior - lights, tires, body
- Interior - controls, gauges, safety equipment
- Engine - fluids, belts, filters
- Safety - fire extinguisher, first aid kit, triangles
If the same category needs to be reused across several templates, Shared Categories Across Templates can help keep those checks consistent.
Assigning Templates to Assets
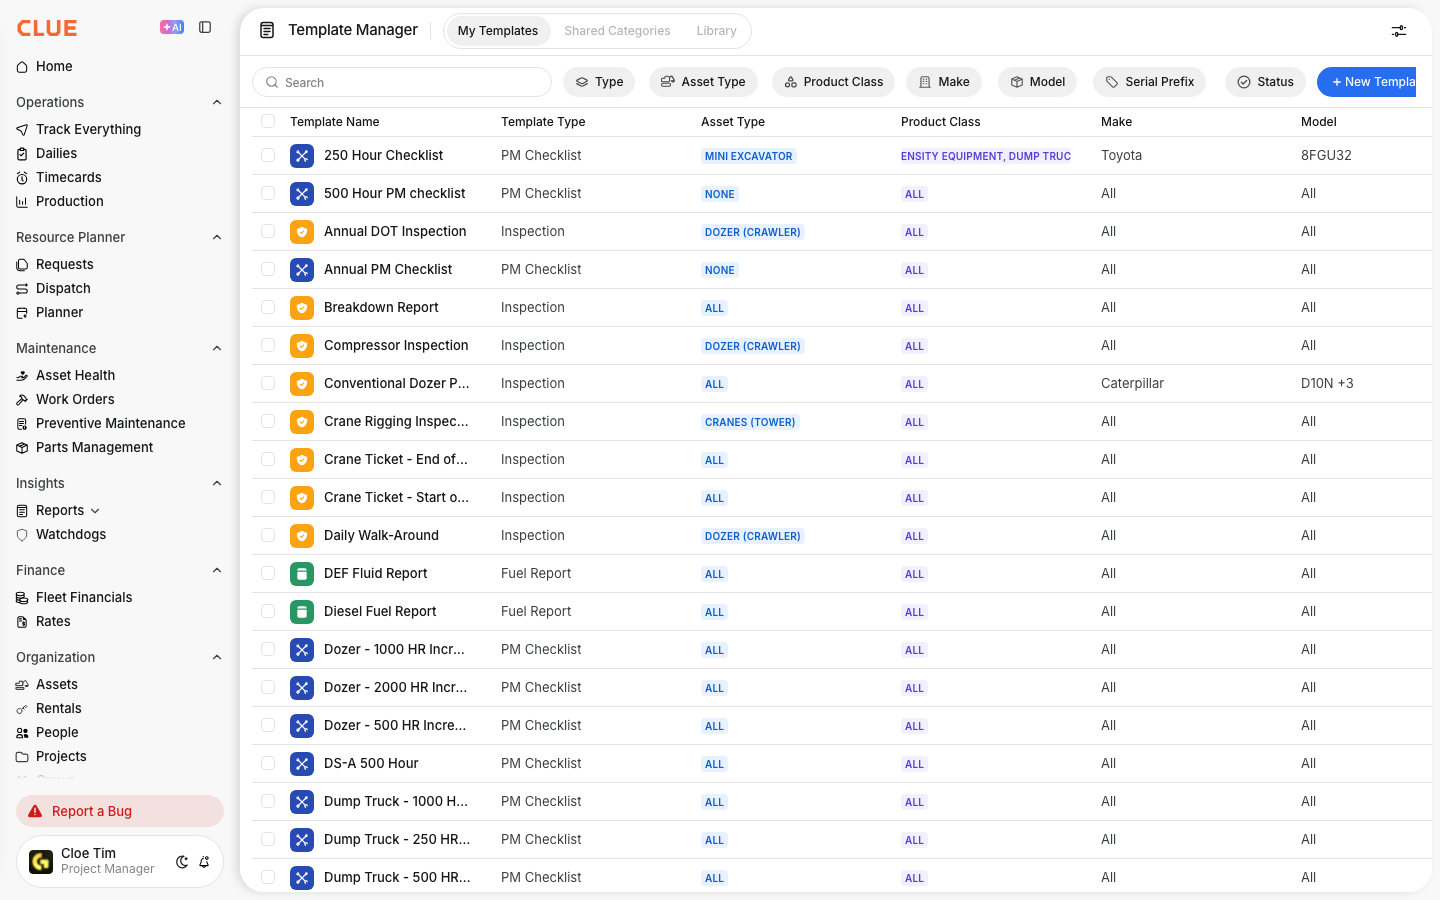
Templates are assigned so the right checklist appears for the right asset. This helps make sure operators are not filling out the wrong form for the equipment they are inspecting.

Templates can be assigned based on:
- Asset type
- Product class
- Individual asset overrides
Once a template is assigned, it becomes part of the inspection flow for that asset. That connects directly with Completing Daily Inspections (DVIR) when the operator is ready to fill it out in the field.
Tips
A simple template usually works better than a long one. The goal is to capture the checks that matter without making the inspection harder to complete.
- Keep templates focused so people do not rush through them
- Include the safety items that matter for your equipment and requirements
- Review templates regularly and update them when equipment or processes change
- Use ready-made options from Template Library: Ready-Made Checklists if you want a faster starting point