Setting PM Intervals
PM intervals decide when service is due. In CLUE, you can set intervals by calendar days, engine hours, or odometer miles so maintenance lines up with how the equipment is actually used.
Overview
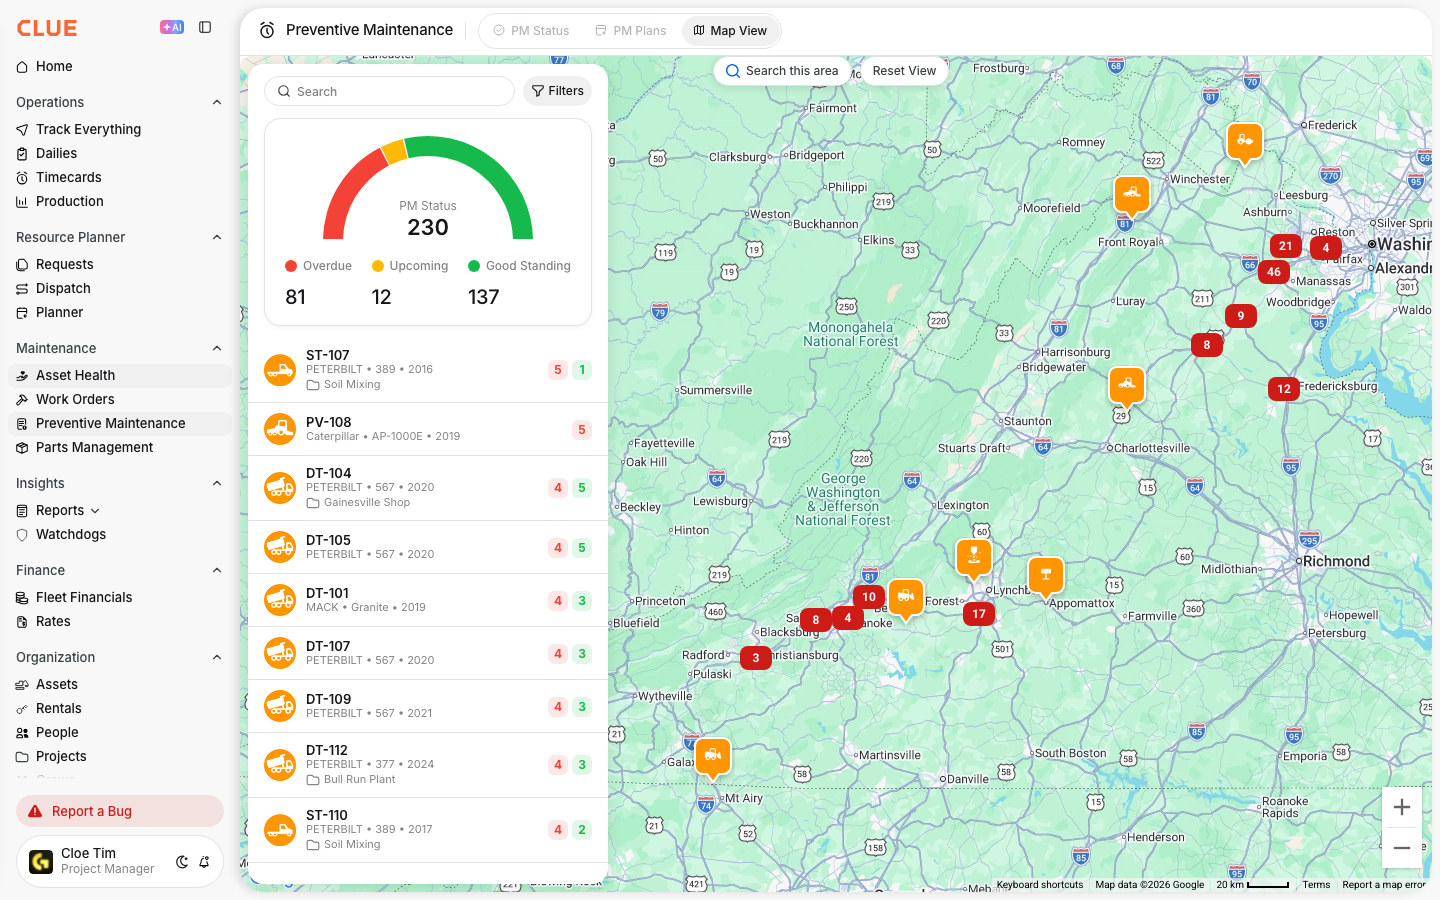
Choosing the right interval helps your team service equipment at the right time instead of too early or too late. This also connects naturally with Using PM Schedules, Creating a New PM Plan, and Understanding Preventive Maintenance.
CLUE supports three main interval types: calendar days, engine hours, and odometer miles. The best option depends on the machine, how it is used, and what kind of service you are planning.
Interval types
Each interval type is meant for a different kind of maintenance schedule. Start with the trigger that best matches how that asset operates in the field.
Calendar (Days)
Use calendar intervals for service that needs to happen on time, even if the asset does not get used much. This is a good fit for annual inspections, seasonal service, and warranty-required maintenance.
Engine Hours
Use engine-hour intervals for equipment that is tracked by meter hours. This works well for oil changes, filter replacements, and larger recurring services that come due after a set number of hours.
Odometer (Miles)
Use odometer intervals for vehicles and other assets where mileage is the main service trigger. Common examples include oil changes, tire rotations, and transmission service.
Setting intervals in PM Plans
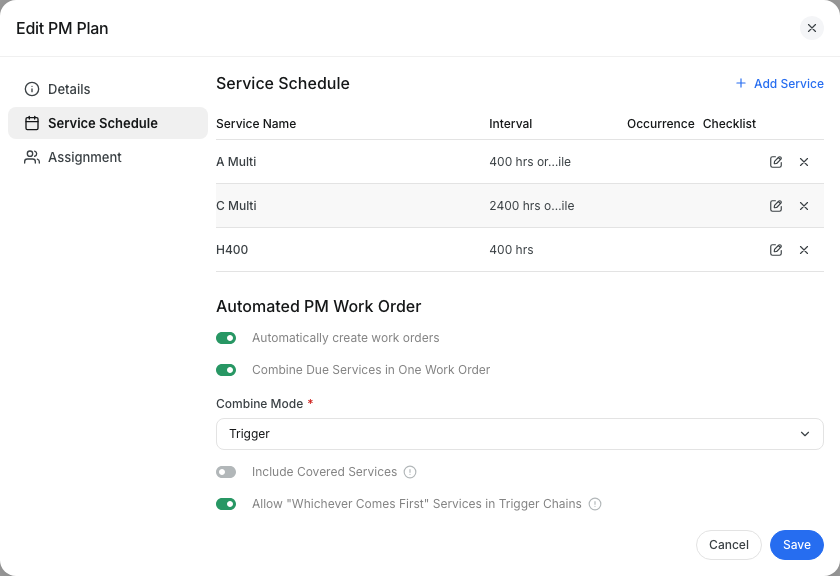
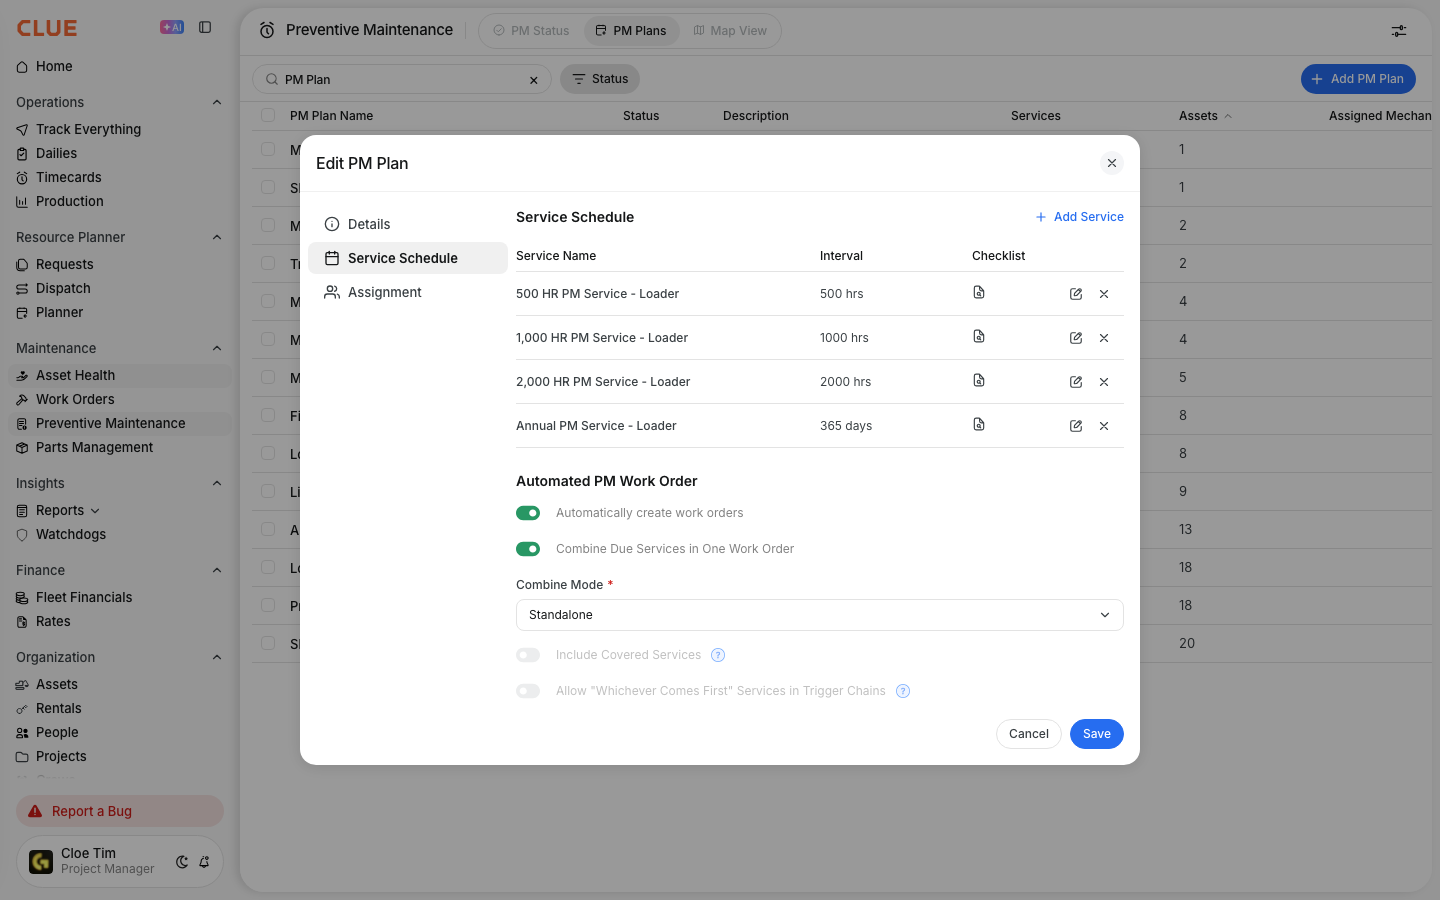
Intervals are set inside the PM Plan for each service item. Once the plan is built, CLUE uses that interval to track when service is coming due.
Step 1: Open PM Plans
Go to Maintenance > Preventive Maintenance > PM Plans.
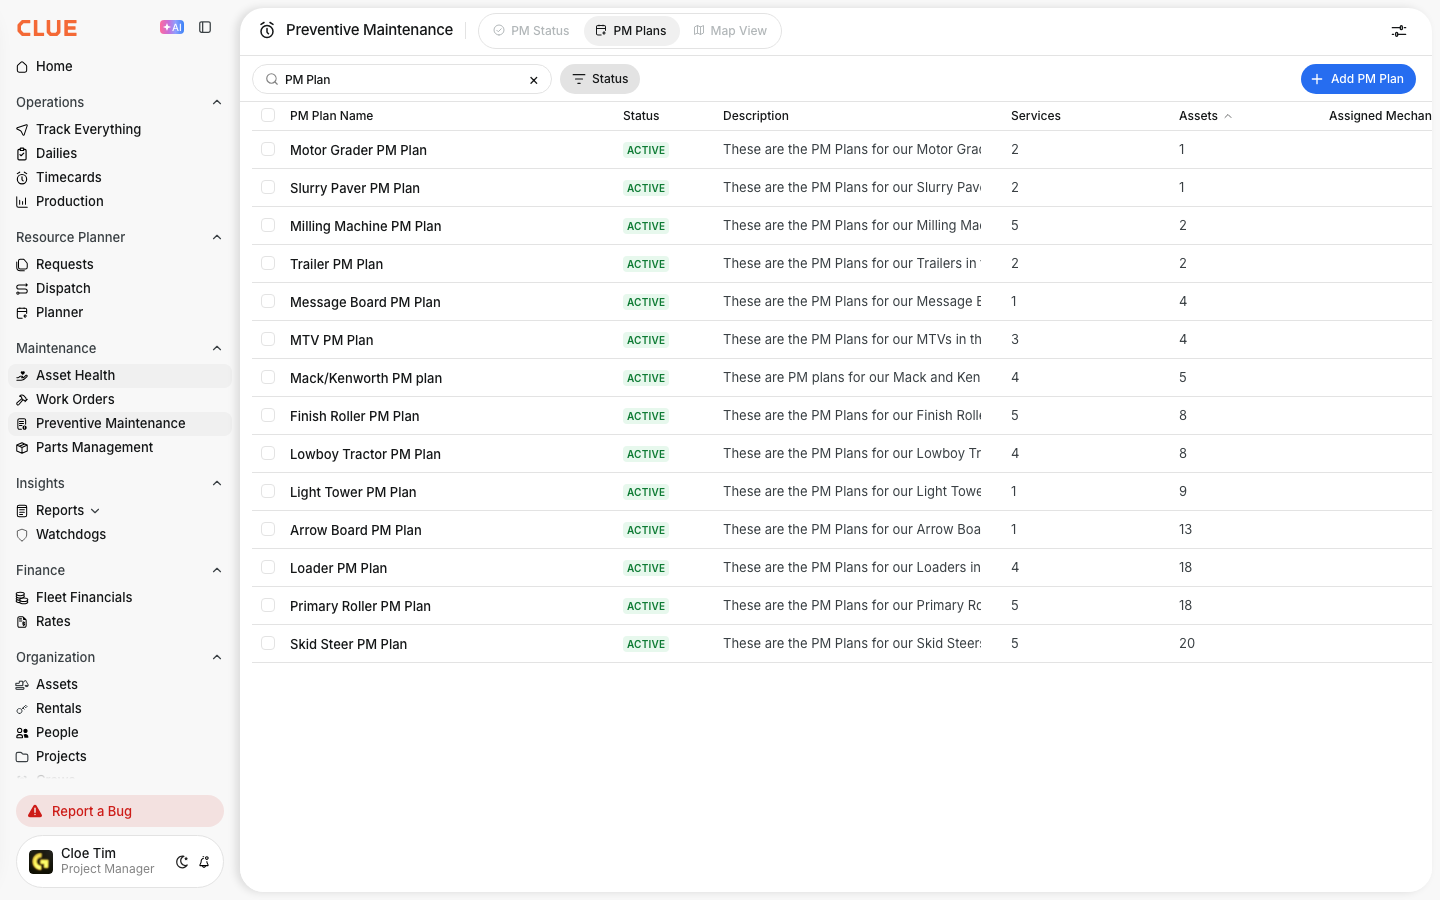
This is where you can view existing plans or build a new one. It is also a natural place to link to Creating a New PM Plan.
Step 2: Create or edit a PM Plan
Open the plan you want to update, or create a new one if the service schedule does not exist yet.
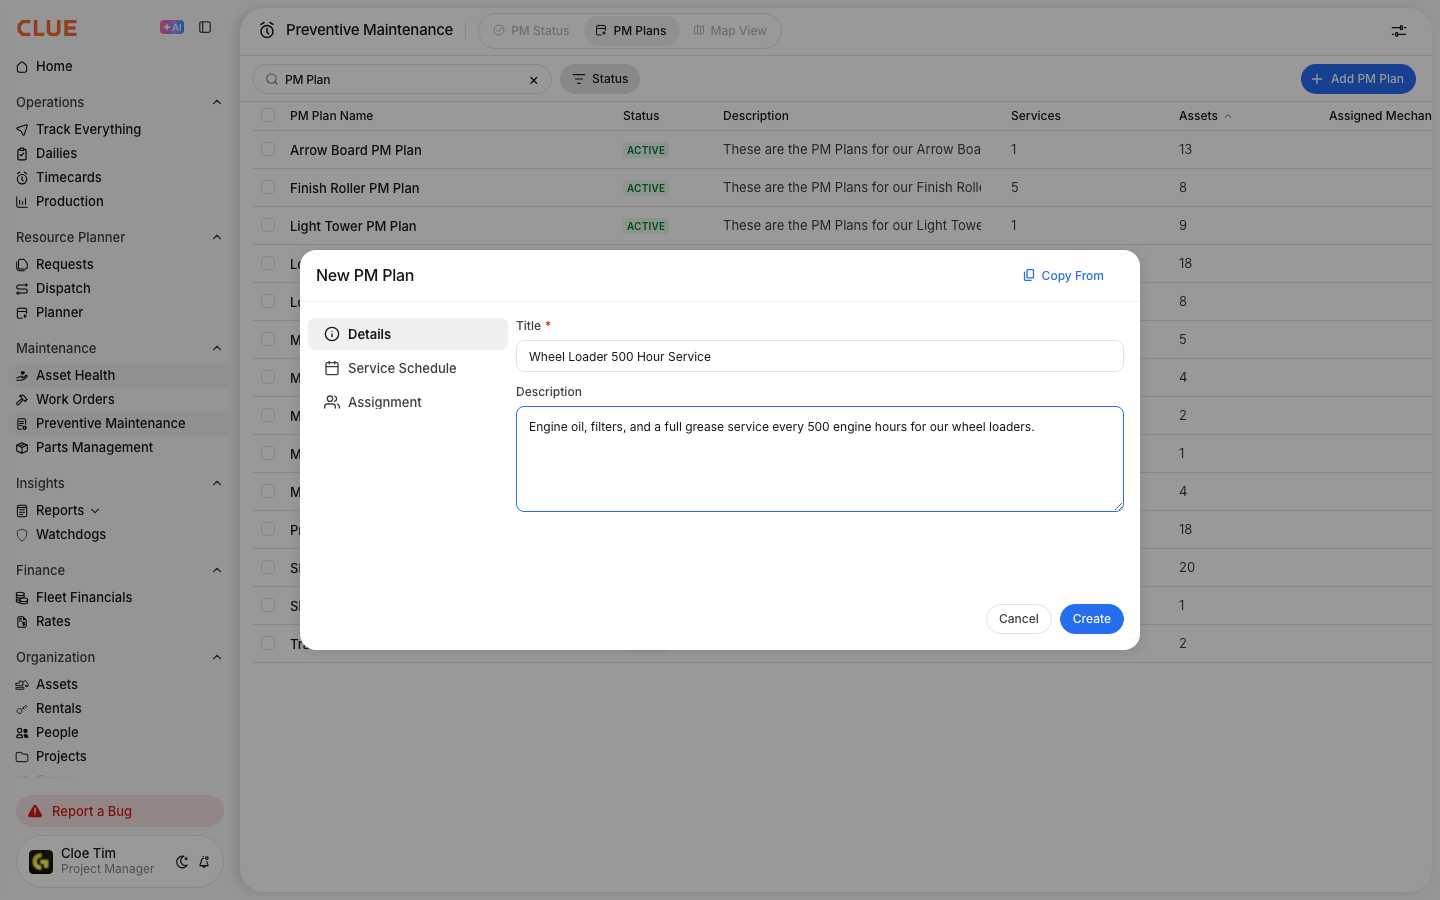
PM Plans define what service is needed, when it is due, and which assets the plan applies to.
Step 3: Choose the interval type
For each PM item, select the interval type that should trigger the service.
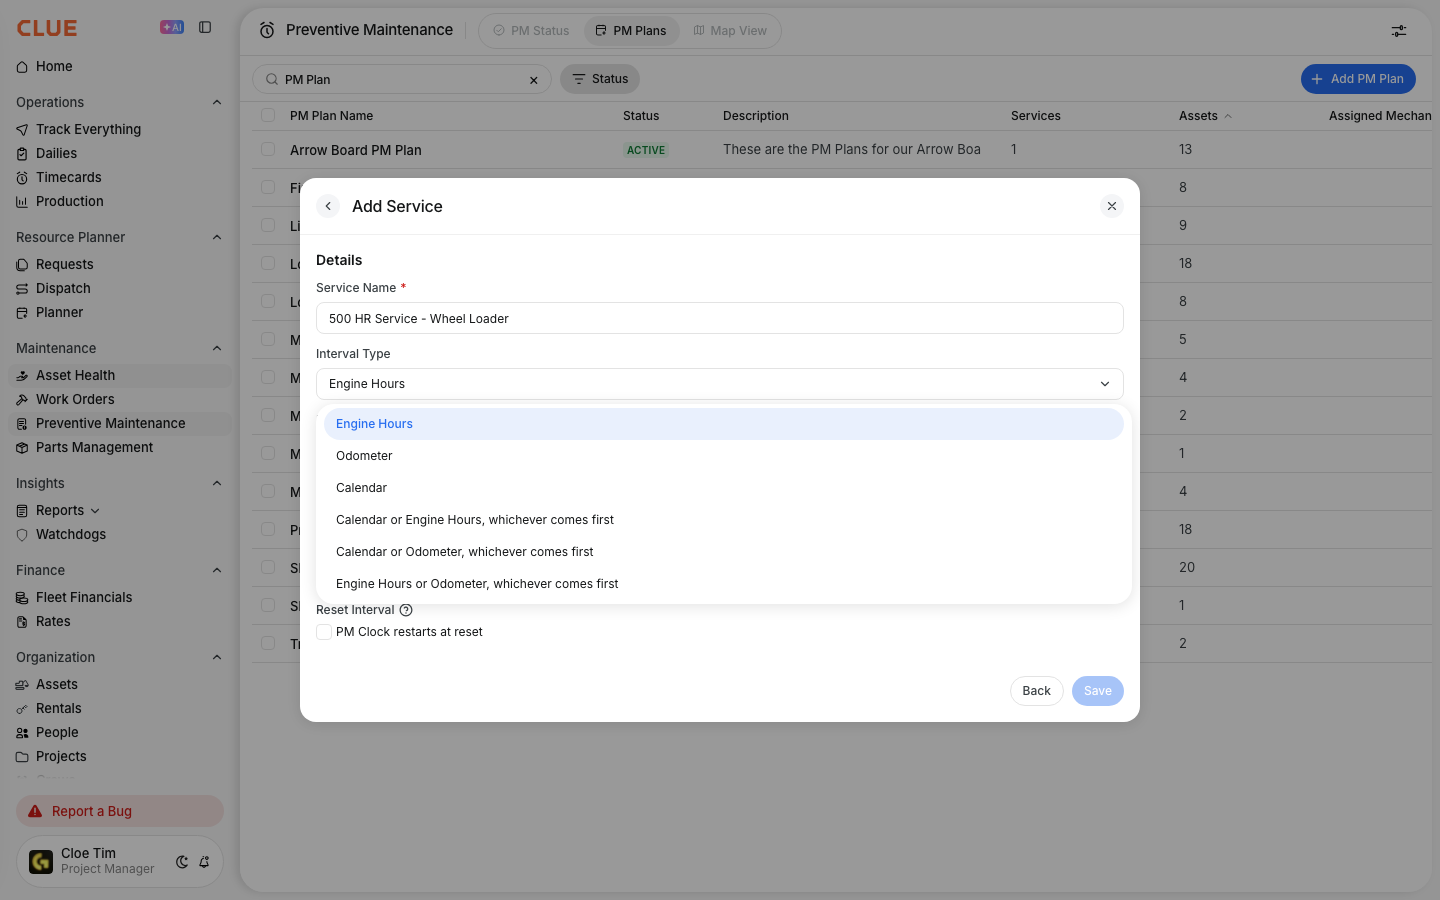
Choose Days, Engine Hours, or Miles based on the asset and the service task.
Step 4: Enter the interval value
Enter the service interval, such as 90 days, 250 hours, or 5,000 miles.
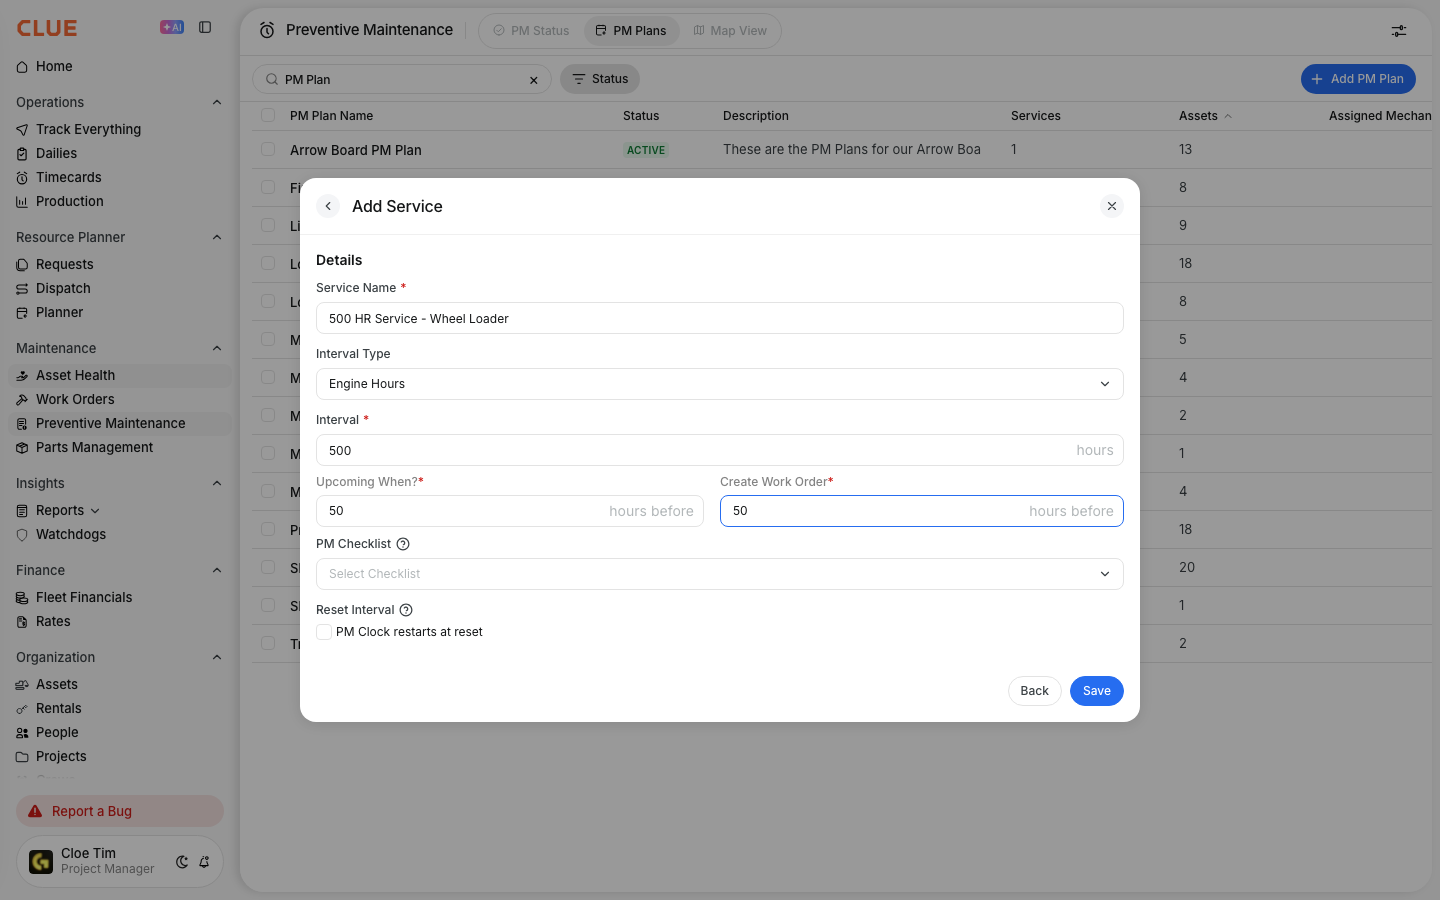
Once saved, CLUE uses that value to determine when the PM item becomes upcoming or overdue. This also pairs well with Using PM Schedules and Viewing PM Status for Your Fleet.
Choosing the right interval
A good interval should match both the equipment and the work it is doing. Start with a solid baseline, then adjust it if real-world conditions show the service should happen sooner.
When setting intervals, consider:
- Manufacturer recommendations - start with OEM guidance
- Operating conditions - dusty, wet, or harsh environments may need shorter intervals
- Equipment age - older machines may need more frequent service
- Usage patterns - high-hour equipment usually needs usage-based intervals instead of time-based ones
Tips
A few simple habits make PM intervals easier to manage over time. The goal is to build intervals that are easy for the team to follow and accurate enough to prevent missed service.
- Use combined triggers when needed, like 90 days or 250 hours, whichever comes first
- Review intervals from time to time and adjust them if actual equipment condition shows the service is too early or too late
- Keep a note on why a certain interval was chosen so future updates are easier
- Use calendar triggers for low-hour equipment that may sit for long periods
- Connect this setup to Resetting PM Counters and PM Statuses Explained so the full PM workflow stays clear