Resetting PM Counters
When preventive maintenance is completed, the PM counter resets so CLUE can start tracking toward the next service. This is what keeps PM schedules accurate from one service cycle to the next.
Overview
PM counters are tied to the service interval on the asset. After a PM is completed, CLUE uses the reset point to calculate when that item will be due again. If you need a quick refresher on how PM tracking is organized, start with Understanding PM Status vs PM Plans.
How PM Resets Work
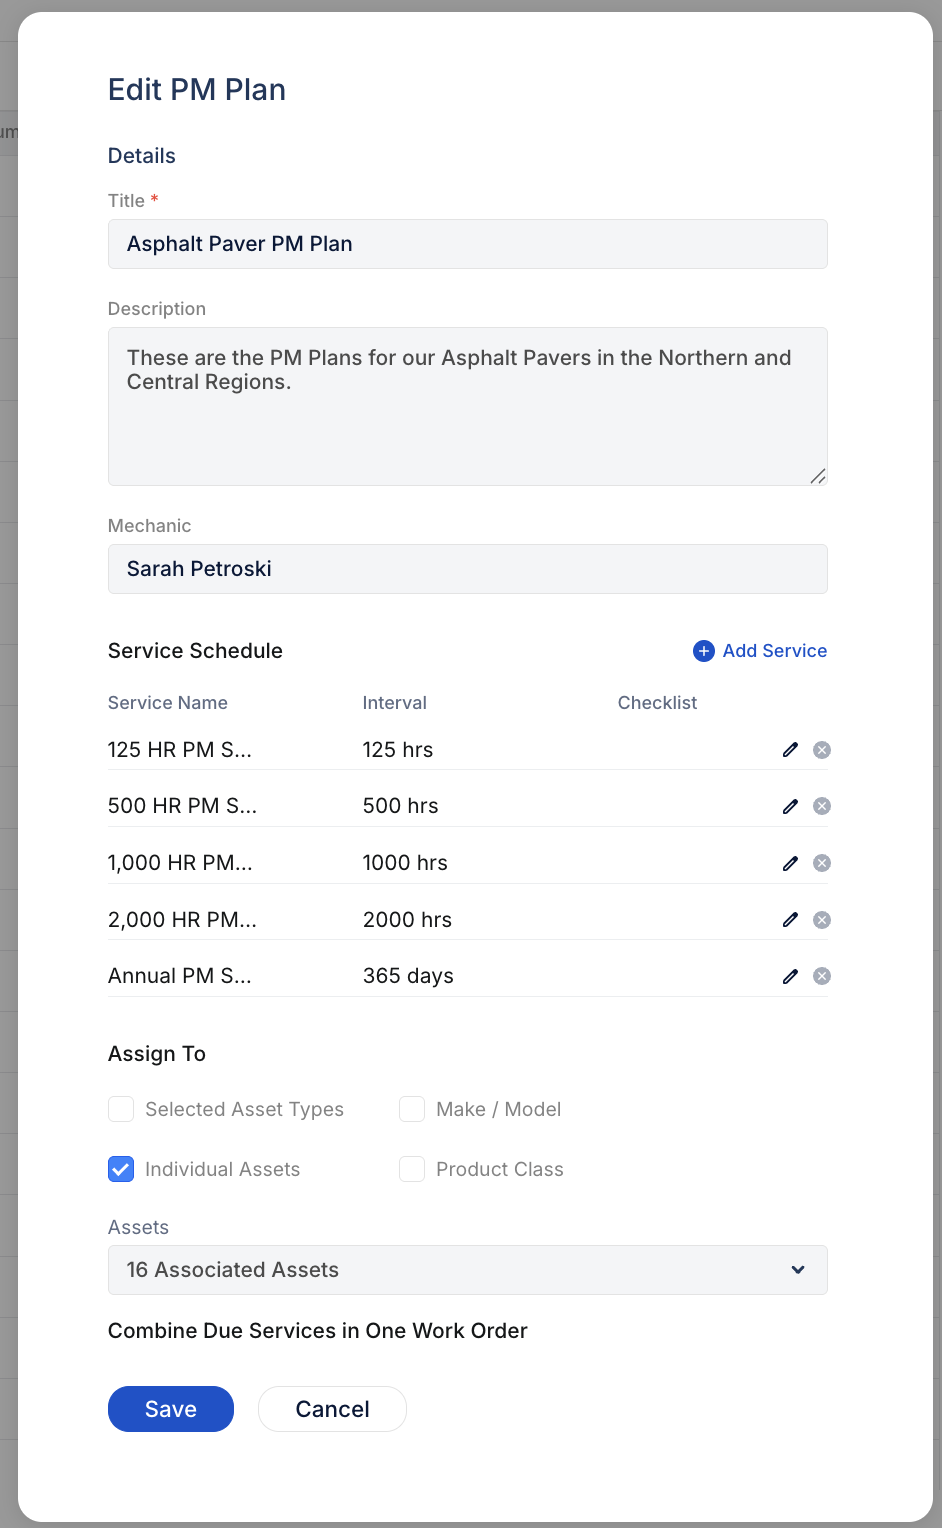
The reset point depends on the type of interval used for that PM item. CLUE supports calendar-based, hour-based, and mileage-based PM intervals, and each one resets from a different baseline.
- Calendar PMs - the new reset date becomes the starting point for the next cycle
- Hour-based PMs - the current engine hours become the new baseline
- Mileage PMs - the current odometer reading becomes the new baseline.
Automatic vs Manual Resets
CLUE supports both automatic resets and manual resets. In most cases, automatic resets are the better option because they keep the PM record tied to the actual work order completion.
Automatic Reset
When a PM work order is completed, CLUE can reset the counter automatically using the completion date or the current meter reading. This is the normal workflow and is usually the most reliable way to keep PM schedules accurate. If you are setting up PM from the beginning, Setting Up Preventive Maintenance and Creating a New PM Plan are the best next articles to review.
Manual Reset
Sometimes a manual reset is still needed. This is useful when service is completed outside CLUE, when a reset value needs to be corrected, or when you are setting the starting baseline for a newly added asset.
Performing a Manual Reset
You can reset a PM item from the PM details. Use a manual reset carefully, and make sure the date, hours, or mileage entered are correct before saving. If you need help finding the PM item first, open Viewing PM Status for Your Fleet.
Step 1: Open PM Status
Go to Preventive Maintenance and open the PM Status tab. Find the PM item you want to reset.
Step 2: Open the PM details
Click the PM item to open its detail view. This is where you can review the current status and latest reset information.
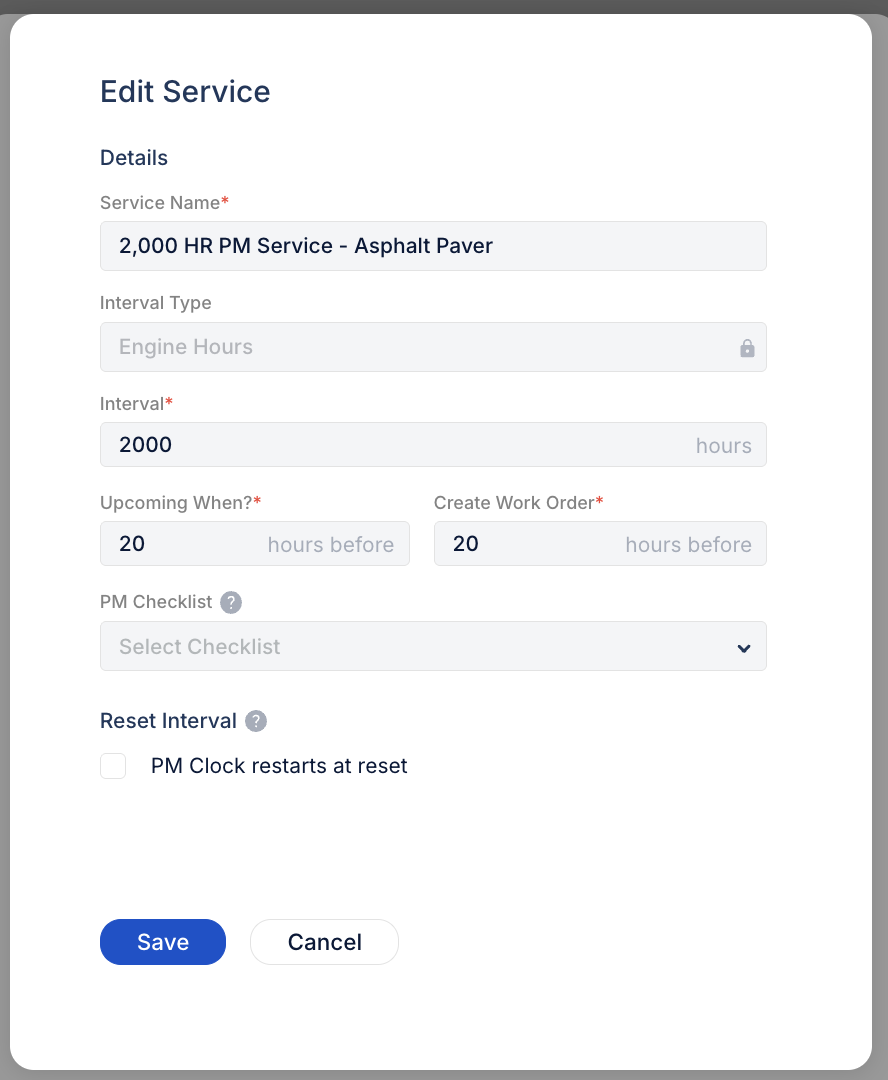
Step 3: Find the reset field
Look for the Reset field or Latest Reset At field in the PM details.
Step 4: Enter the correct value
Enter the correct reset date, engine hours, or odometer reading, depending on the PM interval type.
Step 5: Save the change
Save the reset so CLUE can recalculate the next due point from the new baseline.
Viewing Reset History
CLUE keeps a history of PM resets so you can review what changed and when. This is useful when you need to confirm the latest reset or understand why the next due date moved.
Reset history shows:
- the reset date or value
- who performed the reset
- the related work order, if there is one.
Tips
A few simple habits will help keep PM resets accurate and easier to trust in reporting.
- Check reset values after a PM work order is completed
- Use manual resets only when you need to correct or set a baseline
- Add notes when a manual reset is done outside the normal workflow
- If PM items are not falling where you expect, review the interval setup in Setting PM Intervals.