Completing Daily Inspections (DVIR)
Daily inspections help make sure equipment is safe to use before work begins. In CLUE, operators can complete a DVIR, report defects, add photos, and submit the inspection from the same workflow used to track issues and follow-up repairs.
Daily Vehicle Inspection Reports
A DVIR is used to check the condition of a vehicle or piece of equipment before it is used. It helps your team catch safety issues early and keeps a record of what was found, who reported it, and when it was submitted.
This is also a natural place to connect readers to Understanding Inspection Templates, Reviewing Inspection Issues, and Getting Started with the Mobile App if they need more context around templates, issue follow-up, or field use.
Starting an inspection
You can start an inspection from the inspection area or from the asset record, depending on how your team works. The goal is to make it easy to open the right checklist and complete it while you are with the equipment.
Go to Maintenance > Inspection Issues or open the inspection flow directly from the asset’s detail view. From there, choose the asset and start the inspection form that applies to that unit.
Step-by-step inspection process
The inspection process is meant to be simple enough to complete in the field without paper forms or extra follow-up. Each step helps build a clear record of the equipment condition at the time of inspection.
Step 1: Select the asset
Choose the vehicle or equipment you want to inspect.
This ties the inspection to the correct asset record so your team can review the issue later in Viewing Asset Work History or the inspection log.
Step 2: Choose the template
Select the inspection template that fits the job, such as a DVIR, safety check, or another checklist used by your team.
This is a strong internal linking spot for Understanding Inspection Templates or Template Library: Ready-Made Checklists if the reader needs help with the form setup itself.
Step 3: Complete the checklist
Work through each checklist item and mark it as Pass, Fail, or N/A.
This gives CLUE the inspection result for each item and helps the team see exactly what passed and what needs attention.
Step 4: Add photos
If you find damage or a defect, add photos before you submit the inspection.
Photos help the shop and maintenance team understand the problem faster and give better documentation for follow-up work or reporting.
Step 5: Add notes
Add notes for anything that needs more explanation.
Use notes to describe the issue clearly so the next person reviewing it does not have to guess what was found in the field.
Step 6: Sign and submit
Add your signature and submit the inspection once the checklist is complete.
After submission, the inspection becomes part of the record and can be reviewed later in the inspection log or used to create follow-up work.
Viewing inspection history
Once inspections are submitted, they are stored in the inspection history so your team can look back at what was completed, who did it, and what issues were reported. This helps with compliance, audits, and ongoing maintenance review.
Go to Maintenance > Inspection Issues > Inspection Log to see completed inspections. You can filter the list by date, asset, or inspector to find the records you need. This is also a good internal linking spot for Printing and Exporting Inspection PDFs when readers need to share or save formal inspection records.
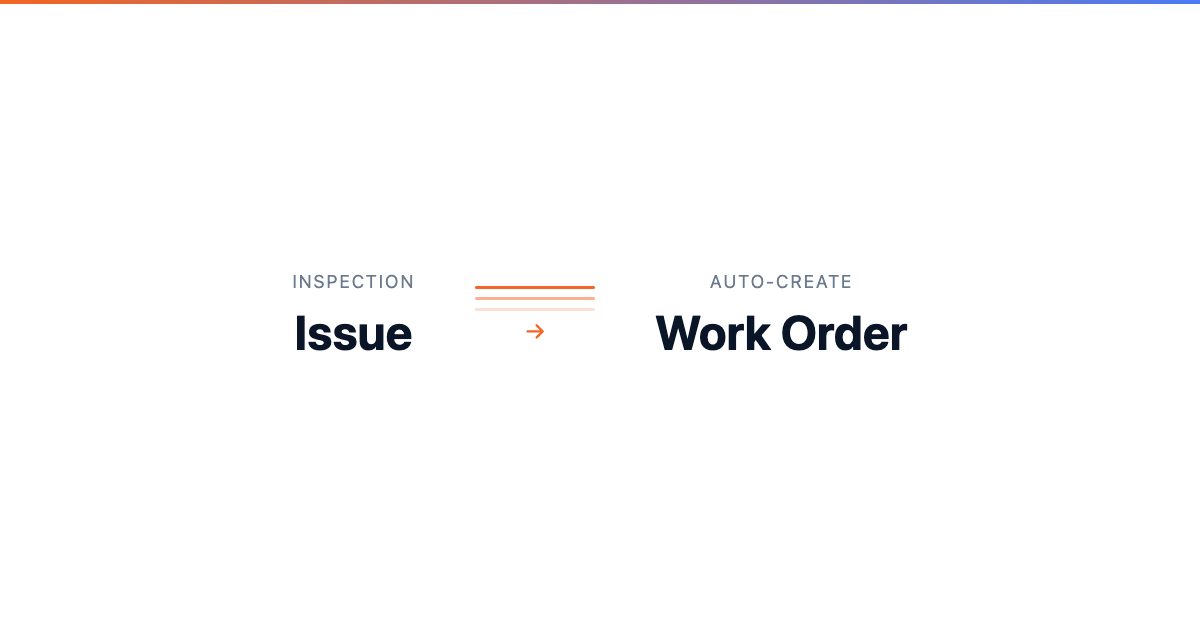
Handling failed items
Failed inspection items do not just stay on the checklist. CLUE uses them to help the maintenance team follow up and decide what needs repair or review next.
When an item fails, the issue is logged automatically. From there, your team can review it in Inspection Issues, create a work order, and track the problem until it is resolved. This section connects naturally with Reviewing Inspection Issues, Resolving Inspection Issues, and Creating Work Orders from Inspection Issues and Fault Codes.
Exporting reports
Inspection records are useful beyond the daily workflow. They also support compliance reviews, client reporting, and internal recordkeeping when you need to share proof that inspections were completed.
Use the export or download options to pull inspection data for reporting. When you need a formal report with branding, photos, and checklist results, Printing and Exporting Inspection PDFs is the strongest related article to link here.
Tips
A few simple habits make DVIRs more useful and easier for the rest of the team to act on. The goal is to make the inspection clear, complete, and easy to follow up on.
- Complete inspections at the time of use, not later in the day.
- Add photos for failed items so the shop can understand the issue faster.
- Use the mobile app when working in the field so inspections are easier to complete on the spot.
- Review failed items in Inspection Issues so problems do not get missed.
- Create a work order from serious defects right away so the repair process starts without delay.