Understanding the Tools Module
Available now in Beta - This feature is in beta testing and will roll out more broadly soon. Tools give your team one place to track items that leave the yard and come back later, whether that item is an asset or a part.
What is this?
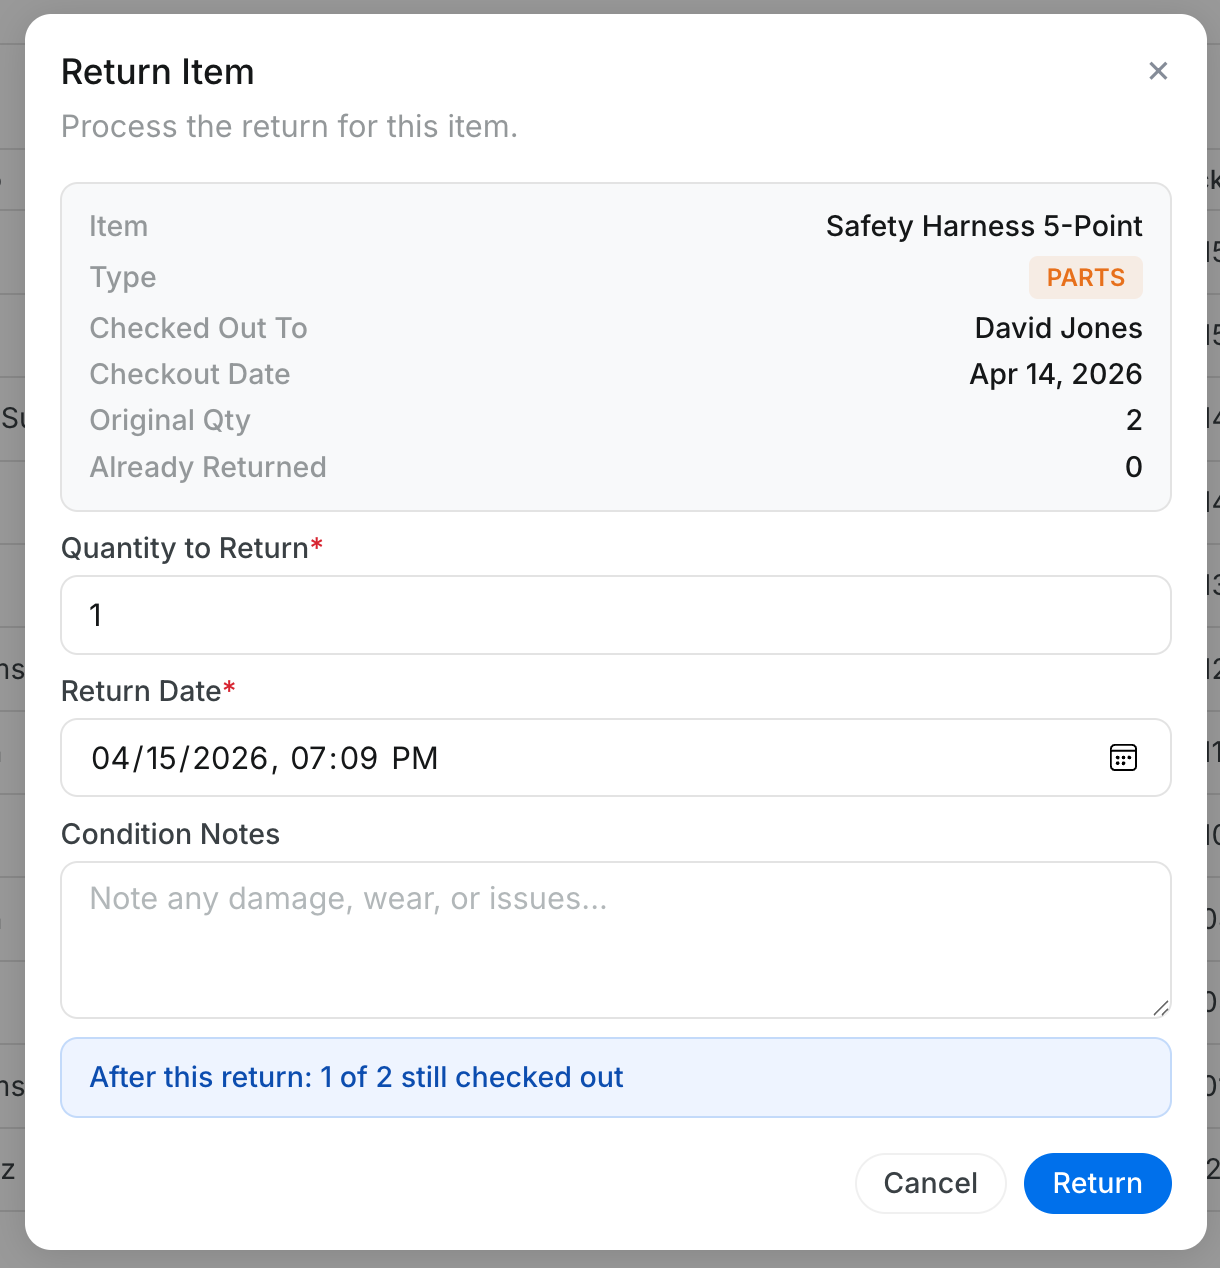
Tools is CLUE’s check-out and return system for equipment and parts. It works like a digital sign-out sheet, so your team can see what went out, who has it, where it went, and whether it has been returned, partially returned, or marked lost. If you need the step-by-step workflow after this, go to How to Check Out Tools and Parts or How to Return Tools and Handle Partial Returns.
Who is this for?
This module is useful for anyone who needs to keep track of tools and parts once they leave the shop.
- Tool Crib Managers - track what left the yard, who has it, and when it should come back
- Dispatchers - check whether an item is already out before assigning it somewhere else
- Mechanics and Field Crews - check out tools and parts for a job, then return them when the work is done
- Project Managers - see what tools and parts are currently out at a project.
How to find it?
You can open the Tools page from the Directory area in CLUE. This page shows all current check-outs and returns in one table, so it is usually the best starting point for day-to-day tracking.
Step 1: Open the Tools page
In the sidebar, expand Directory and click Tools. The table opens with every item and its current status. Once you are there, Using Search and Filters can help if you need to narrow the list quickly.
Understanding the table
The table is built to show the main details your team needs first. Each row represents one checked-out item or return record, so you can scan the page without opening every entry.
Each row shows:
- Item Name and Type - whether the item is a part or an asset
- Qty checked out - for parts, this can show a fraction when only part of the quantity has been returned
- Checked Out To and Project - who has the item and where it is being used
- Checkout Date and Expected Return - when it went out and when it should come back
- Status - Checked Out, Returned, Partially Returned, or Lost.
Filtering and searching
Search and filters make the Tools page easier to work with when the table gets longer. Use them to focus on the items that matter right now instead of scanning the full history every time.
Use the Status filter to show only checked-out items for your daily view, only returned items for history, or only lost items when you need follow-up. Use the Item Type filter to switch between parts and assets. The search bar helps you find items by name. If you need to change the status of an item, the next step is usually How to Return Tools and Handle Partial Returns.
The full details
Here are the main details to know about the Tools module.
- Works on: Web app
- Location: Directory > Tools
- Item types: assets and parts
- Statuses: Checked Out, Returned, Partially Returned, and Lost
- Languages: English, Spanish, Portuguese, and French
- Former name: Check In/Out.
Tips
A few simple habits can make the Tools page much easier to manage day to day.
- Filter by Checked Out when you want the quickest view of what is still out in the field
- Add an expected return date whenever possible so overdue items are easier to catch
- Watch the quantity column for partial returns, especially on parts
- If someone is about to take an item, open How to Check Out Tools and Parts first so the record starts cleanly
- If an item comes back but the quantity is not complete, use How to Return Tools and Handle Partial Returns so the remaining balance stays visible.