Creating a New Dispatch
Dispatch
Reading Time:
4 min read
Overview
Dispatch lets you move equipment between locations by scheduling transport. This guide shows you how to create a new dispatch to assign assets to their destination.
Step 1: Navigate to Dispatch
Go to Resource Planner > Dispatch in the sidebar. The Dispatch page shows tabs for Assets, People, and Everything On Site.
Step 2: Click New Dispatch
Click the orange New Dispatch button in the top-right corner. The New Dispatch form opens.
Step 3: Fill Out the Form
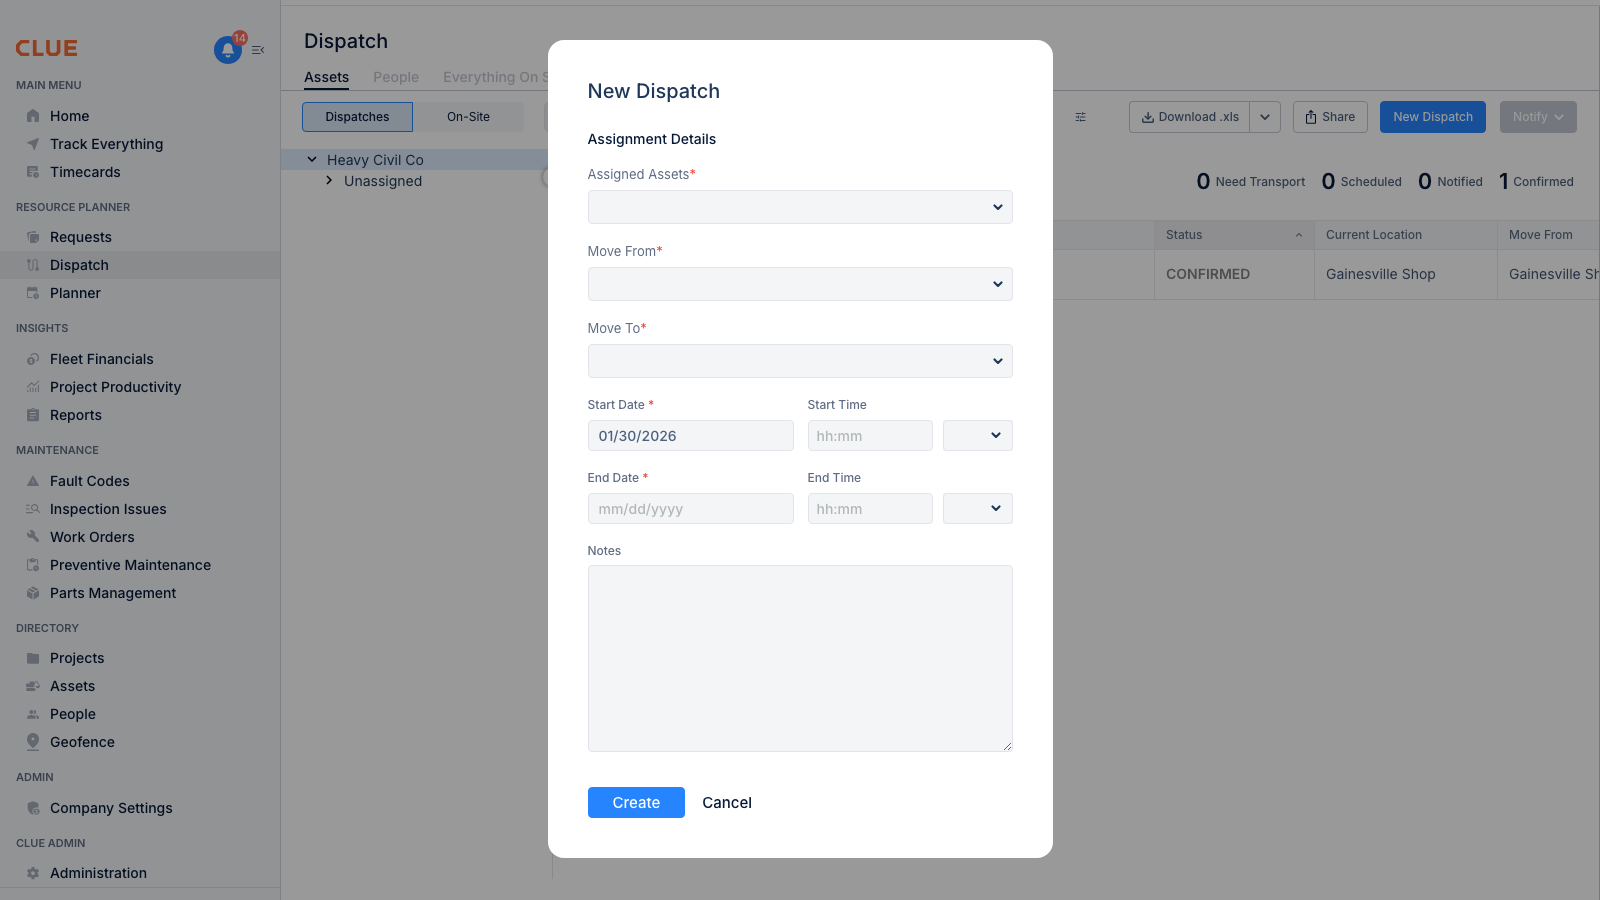
Assignment Details
- Assigned Assets* - Select one or more assets to dispatch (required)
- Move From* - The current location or pickup point (required)
- Move To* - The destination location (required)
Schedule
- Start Date* - When the dispatch begins (required)
- Start Time - Specific departure time (optional)
- End Date* - Expected completion date (required)
- End Time - Expected arrival time (optional)
Additional Information
- Notes - Add any special instructions, contact info, or details about the move
Step 4: Create the Dispatch
Click Create to schedule the dispatch. The dispatch will appear in your Dispatches list and the assigned assets will show their scheduled move.
Dispatch Status Flow
After creation, dispatches move through these statuses:
- Need Transport - Dispatch created, awaiting transport assignment
- Scheduled - Transport arranged
- Notified - Relevant parties have been informed
- Confirmed - Dispatch confirmed and in progress
Tips
- Use the Assets tab to see all equipment and their current locations
- Add notes with driver contact info for complex moves
- Set realistic date ranges to allow for transport logistics
- Use the On-Site view to see what's already at each location